Alternating Side Lunges: Form, Reps, and Smart Variations
 15 min
You're between meetings, the room's quiet for once, and you've got three minutes before the next call. You search a side-lunge demo, step out a little too far, wobble, feel the inside of one knee complain, and move on. That's the usual fate of alternating side lunges when they're treated like a quick clip instead of a real movement pattern.
Done well, though, they're a useful lower-body drill with a different job than a forward lunge. They ask for side-to-side control, ankle mobility, and clean knee tracking, and they load the hips, knees, and ankles in a way you don't get from ordinary walking or straight-ahead squats. If you want a bodyweight movement that fits a short home session and still earns its place, this is one worth learning slowly.
Table of Contents
- Why Alternating Side Lunges Deserve a Real Place in Your Workouts
- What the Research Says About Lateral Lunging
- Step-by-Step Technique for Alternating Side Lunges
- Sets, Reps, and a Beginner-Friendly Weekly Plan
- Smart Variations from Beginner to Advanced
- Mobility Limits, Joint Pain, and When to Adjust
- Fitting Alternating Side Lunges into Your Week
Why Alternating Side Lunges Deserve a Real Place in Your Workouts
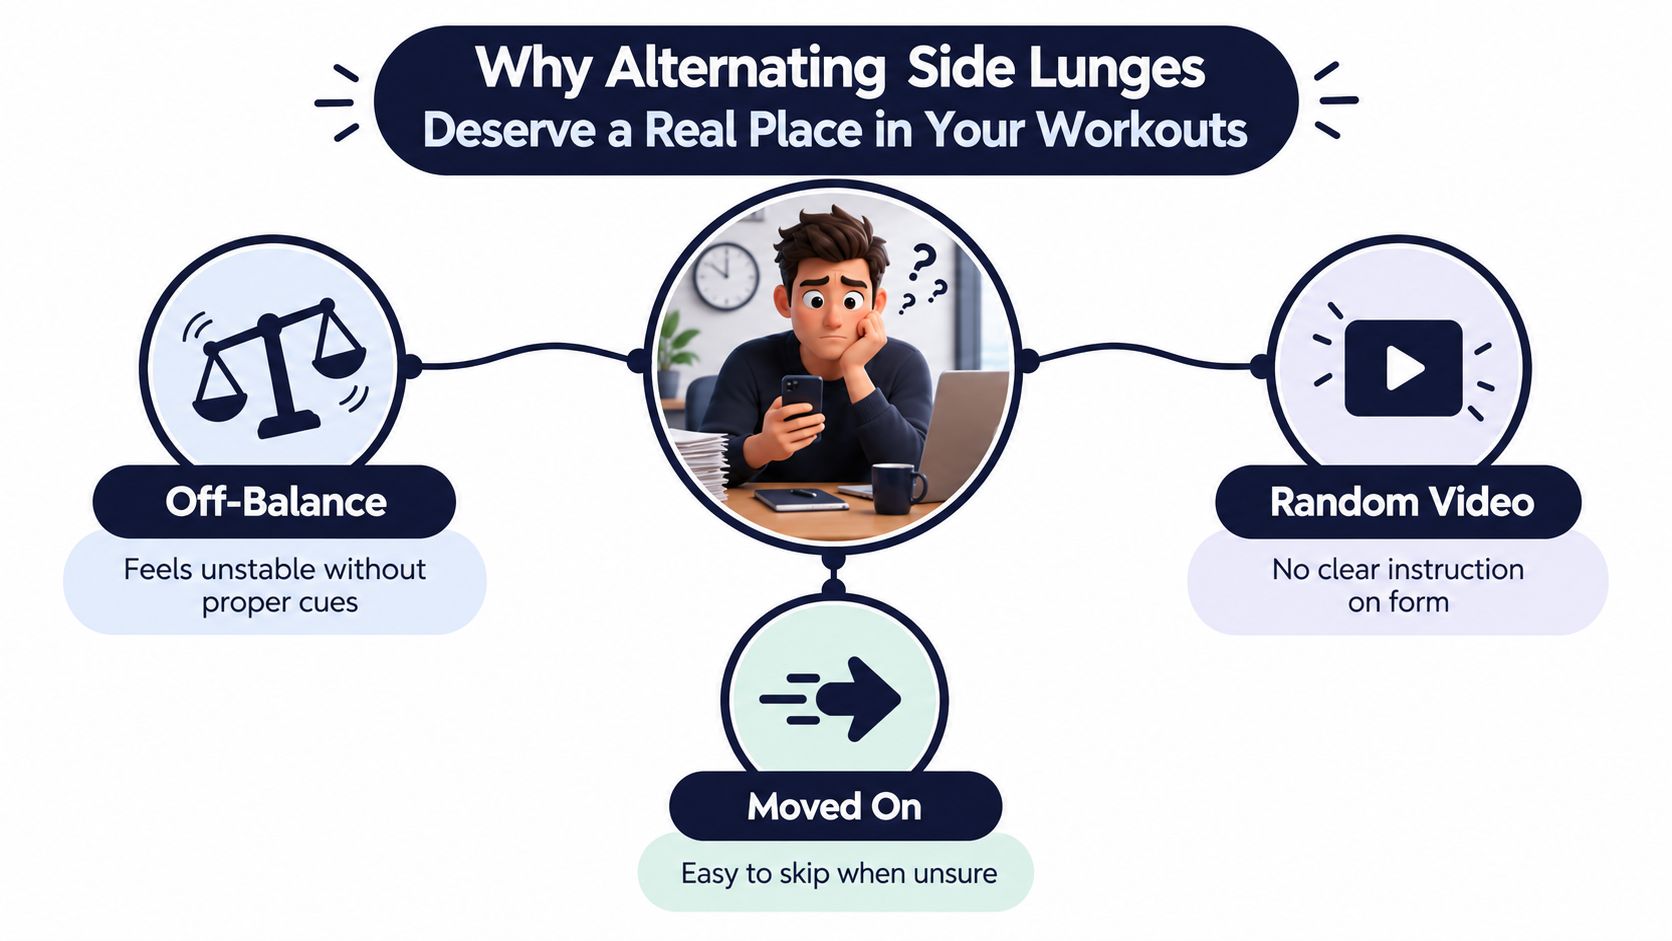
A lot of people try a side lunge from a random video, feel unstable, and decide the movement just isn't for them. Usually, the problem isn't the exercise itself. It gets introduced like a throwaway variation instead of a distinct pattern with its own demands.
A different pattern, not just a sideways forward lunge
Alternating side lunges are a frontal-plane lunge variation, so they challenge movement and control in a direction forward lunges do not emphasize. In a 2022 biomechanical study of 32 recreationally active adults doing forward and lateral lunges, the lateral pattern produced 83.5% greater ankle flexion with standardized step length and 55.3% greater ankle flexion when participants chose their own distance, compared with the forward lunge (2022 biomechanical study). That is one reason the exercise can feel unfamiliar even if you already train legs.
The same study found the lateral lunge created 71.3% greater ankle impulse under standardized conditions and 47.6% greater knee impulse with standardized lateral lunges, while forward lunges produced 64.5% greater hip impulse under standardized conditions as reported in the same 2022 study. In plain language, the load shifts. You are not just moving in a new direction, you are asking the ankle and knee to do more of the work than they do in a straight-ahead lunge.
Practical rule: if a side lunge feels like a balancing act first and a leg exercise second, the step is probably too wide or too fast.
Why that matters in a bodyweight session
That shift in demand is useful. Another biomechanical comparison showed lateral lunges produced larger frontal-plane and rotational stresses than ordinary walking, including about 34% greater knee abduction moment, roughly 50% greater lateral knee force, and about 53% greater hip external-rotation moment as reported in the Dundee biomechanical comparison. Those are the kinds of demands that make this more than a warm-up stretch.
Alternating sides also changes the training feel. Instead of standing in one split stance and repeating the same side until fatigue blurs your alignment, you get repeated transitions from center, to loaded side, and back again. That makes the movement a good fit for short bodyweight sets, especially when you want coordination and lower-body work without equipment.
What the Research Says About Lateral Lunging
A side lunge is not a throwaway variation. It asks the body to handle side-to-side force, control the knee and hip differently, and keep the trunk organized while the load shifts off center.
What changes at the ankle, knee, and hip
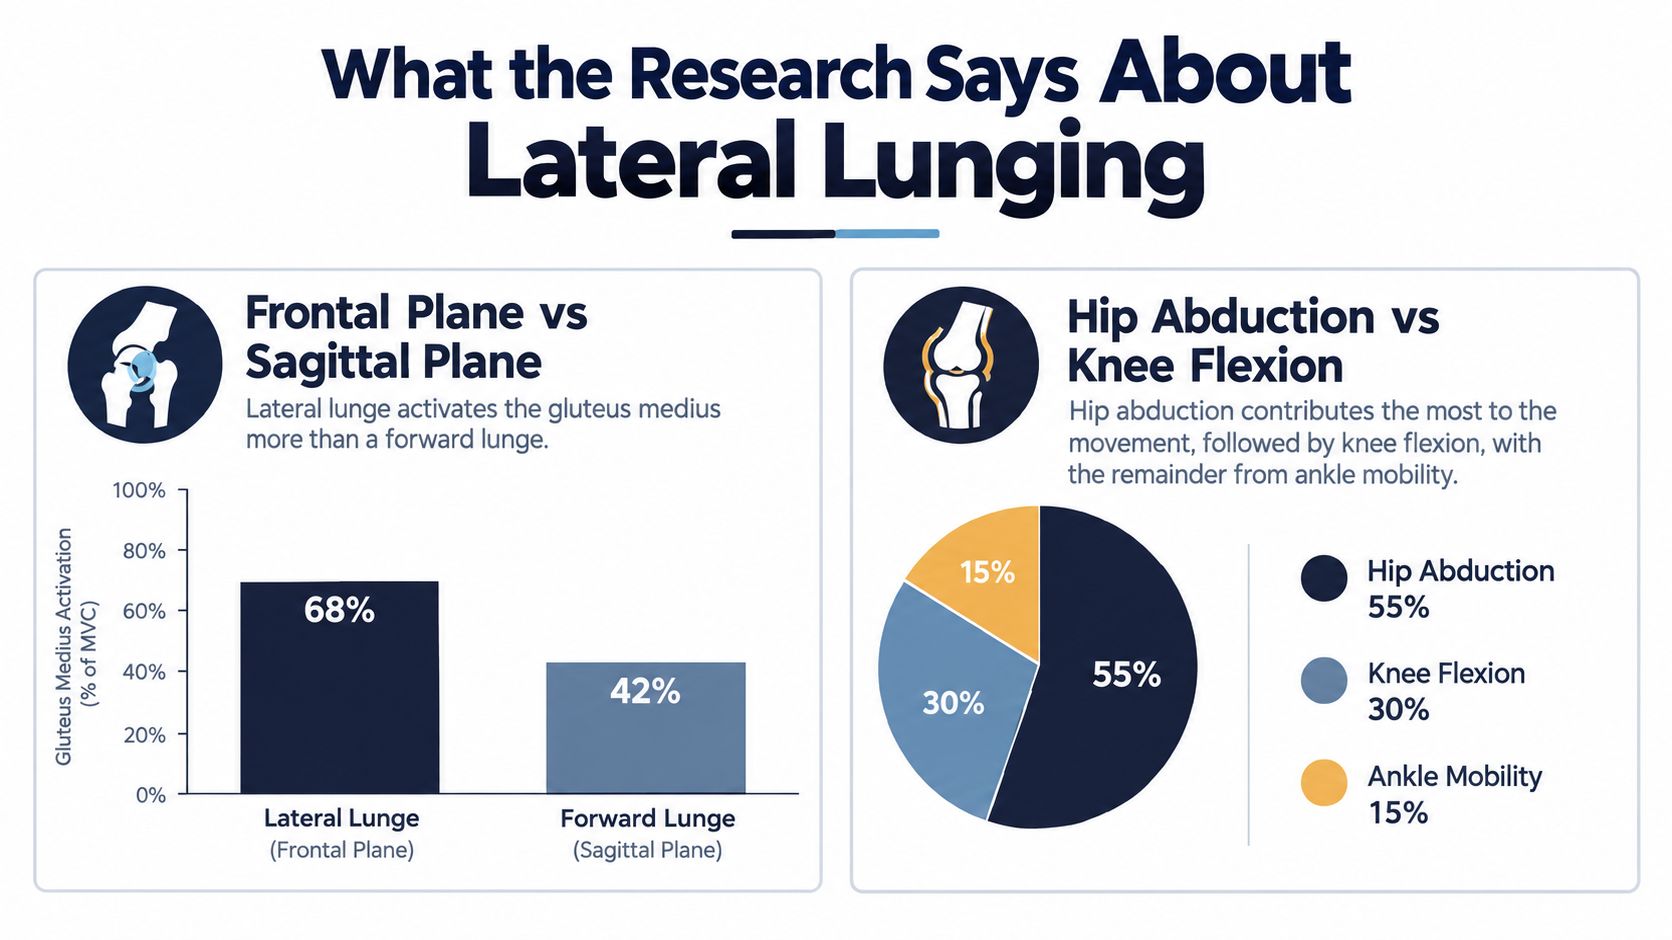
The clearest comparison comes from the 2022 forward-versus-lateral lunge study. Lateral lunges asked for more ankle motion and more knee contribution, while forward lunges shifted more impulse to the hip in that same study. That is one reason a lateral lunge can feel more demanding through the lower leg and less like a straight-ahead strength drill.
A separate biomechanical comparison points in the same direction. Relative to walking, lateral lunges increased frontal-plane and rotational demand at the knee and hip, including the higher knee abduction moment and hip external-rotation moment already noted in the Dundee comparison of lateral lunges versus walking. In plain terms, the body has to keep the knee from caving in and manage side loading instead of just moving forward.
Alternating sides makes that pattern useful in practice. Each repetition still asks one leg to control the load, but the switch back to center keeps the movement dynamic and easier to slot into short bodyweight sets. It also avoids turning the drill into a long grind on one side.
The value is not in making the motion huge. The value is in making it clean.
What this means for your workout
That loading profile is useful in a small footprint. Alternating side lunges can train coordination, ankle mobility, and lower-body endurance without any equipment, which makes them fit well into two to five minute sets.
They also belong in the lower-body strength category, not in a casual mobility bucket. If the movement is sloppy, the knee and hip lose the benefit and the body starts fighting for position. If the movement stays controlled, each joint does its job and the exercise earns its place.
Step-by-Step Technique for Alternating Side Lunges
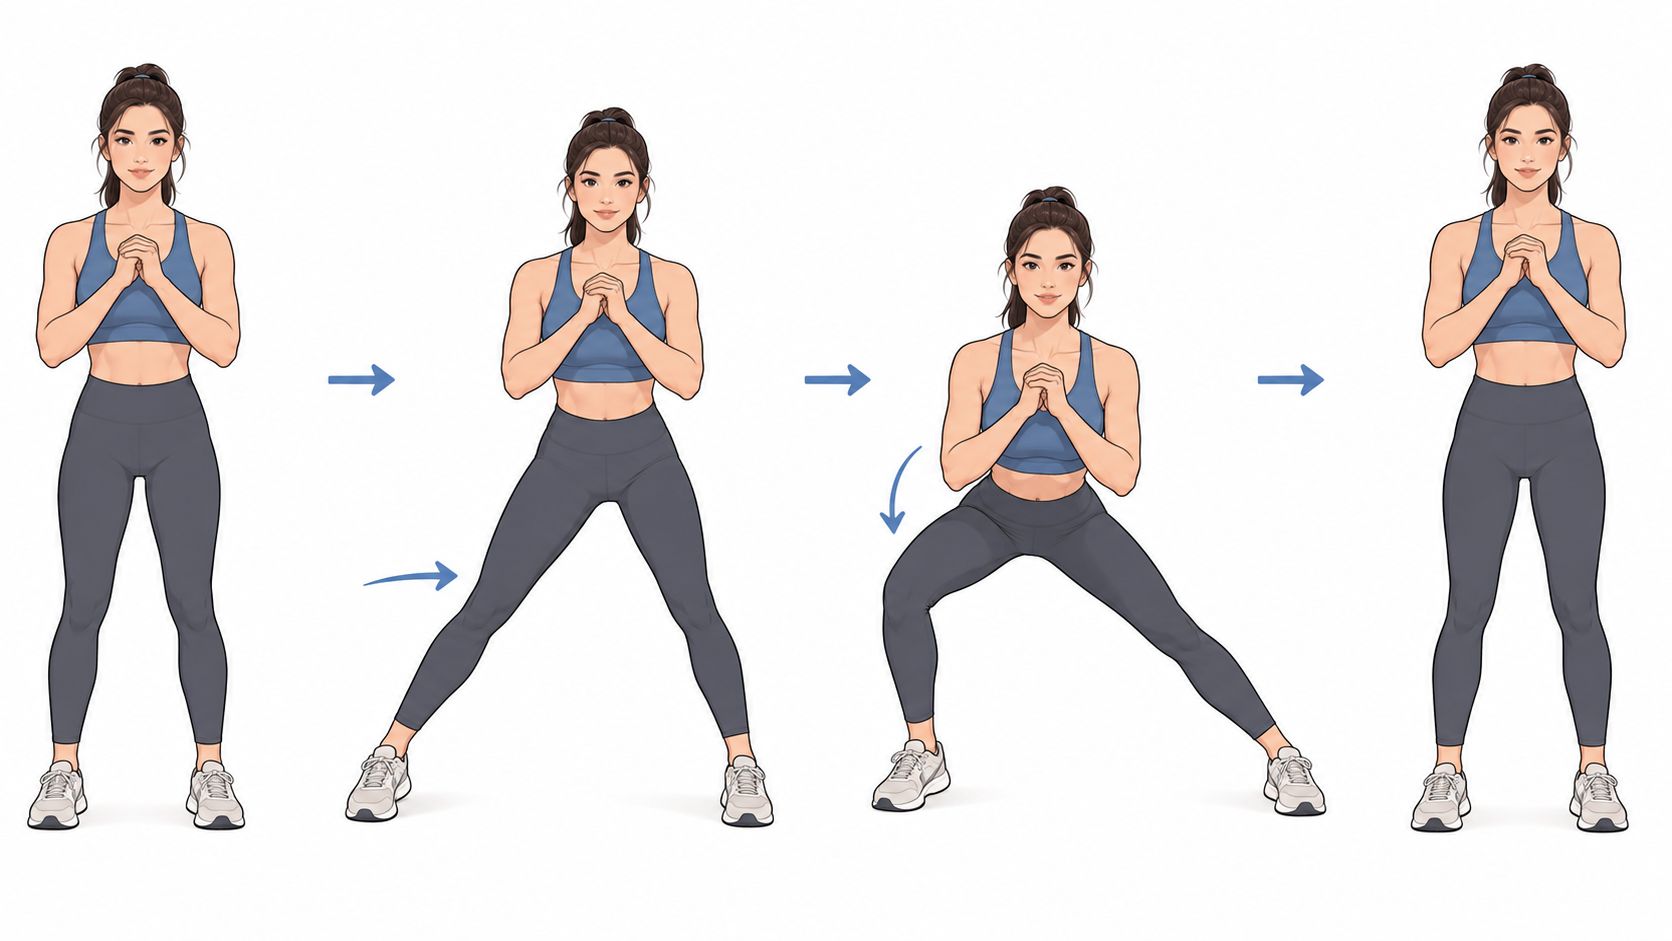
Start standing with your feet hip-width apart and both feet parallel. Brace your trunk, keep your heels grounded, and take a breath before you move. The aim is a controlled weight shift, not a big step that makes the body chase the rep.
The down phase
Step to the side and let the stepping leg accept your weight first. Send the hips back as you lower, and keep the shin close to vertical so the knee tracks toward the second toe instead of collapsing inward. ACE specifically flags excessive step width as a common mistake because it makes tibial alignment harder to keep and encourages the knee to cave in (ACE side lunge).
Keep the opposite leg extended and the torso slightly inclined, but do not fold forward. A neutral spine is fine. You want a hip-driven lateral shift, not a reach for the floor.
The return and the switch
Drive through the loaded heel to come back to center. Exhale as you stand, then reset both feet before stepping the other way. That reset matters because it keeps each rep symmetrical instead of turning one side into a rushed scramble.
Use a slow tempo here, with about a 2-second descent and a controlled return to center before switching sides. Keep the motion crisp enough to stay organized, but not so fast that the pelvis twists or the knee starts wandering. You should feel the loaded leg working, while the rest of the body stays quiet and stacked.
If the heel lifts, the pelvis rotates, or the knee keeps drifting inward, the set is over for now.
Shorten the step, clean up the foot position, and try again with less range. A smaller rep that stays aligned trains better than a bigger one that looks dramatic and falls apart.
Sets, Reps, and a Beginner-Friendly Weekly Plan
A useful starting point is small enough to repeat without hesitation. That matters with bodyweight work at home, especially if you are fitting a few quality minutes between chores, calls, or a short break.
A simple starting block
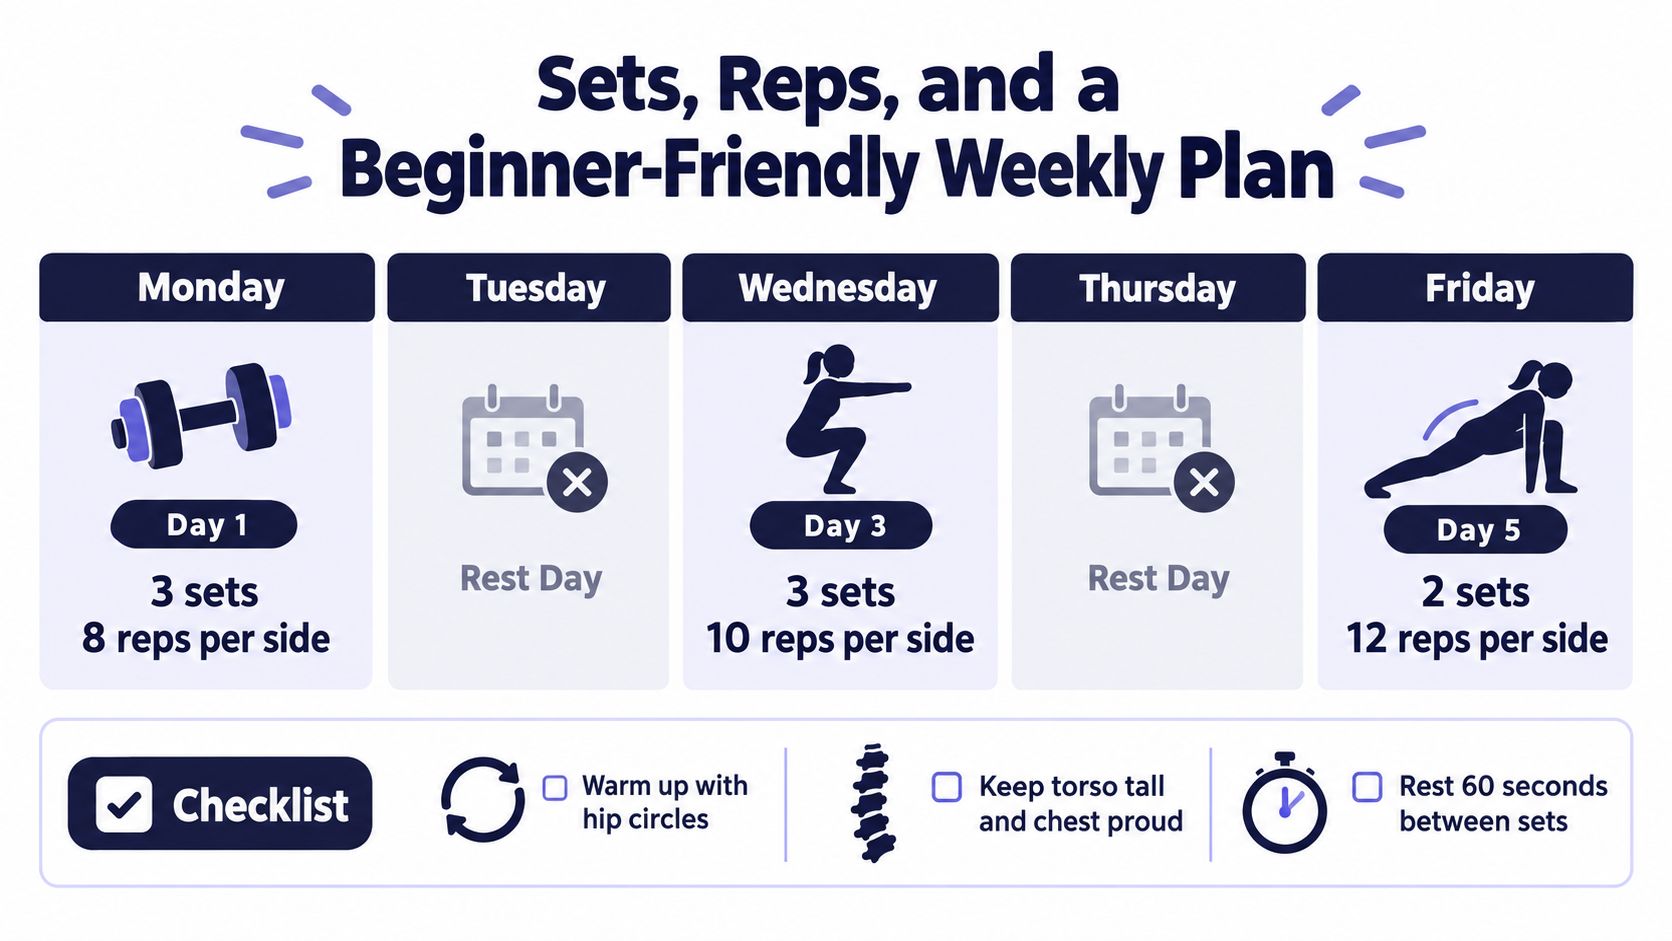
Start with the slow 6-to-8-rep block from the technique section, then use this weekly Day 1, Day 3, Day 5 pattern to repeat it. The progression there, along with basic bodyweight guidance that commonly uses 8 to 12 reps per exercise, one to three sets for beginners, and two or three nonconsecutive training days each week, gives you a practical frame for this movement per ACE side-lunge guidance and the beginner bodyweight training guide.
A simple weekly pattern looks like this:
- Day 1: 1 to 2 easy sets, focus on form and balance.
- Day 3: 2 to 3 sets, stay slow and clean.
- Day 5: 2 to 3 sets, only increase depth if alignment stays good.
Keep the rest periods short enough that the drill still feels like a micro-session, but long enough that the next rep does not turn into a wobble-fest. If your breathing is still ragged, wait a little longer before the next set.
How to progress without rushing
Progress in this order. First, slow the tempo. Then increase range a little. Then add a set if the movement still feels crisp. Load comes later, not earlier.
A good checkpoint is the bottom position. You want tension in the working leg and a stretch through the inner thigh on the straight leg, but not joint pain or a collapse of posture. If the rep starts looking like a side sway instead of a lateral lunge, the dose is too aggressive. The movement should still feel controlled enough that you could repeat it two or three times later in the week without dreading the next session.
Smart Variations from Beginner to Advanced
Not everyone needs the same version on day one. The right variation depends on balance, hip control, and whether the movement feels productive or just awkward. A good coach picks the version that lets the rep stay honest.
| Variation | Cue Focus | Best For | Trade-off |
|---|---|---|---|
| Supported side lunge | Light hand support, shorter step, steady alignment | Beginners, returners, or anyone with balance concerns | Less balance challenge, easier to keep good form |
| Tempo-controlled bodyweight side lunge | Slow descent, vertical shin, clean return | Most people starting out | Still demanding, but manageable in short micro-sets |
| Pause lateral lunge | Hold briefly at the bottom before driving back | Intermediates who want more control | More time under tension, more fatigue |
| Deficit side lunge | Step from a low platform or step | Advanced trainees with good mobility | Greater range of motion, more joint demand |
| Loaded side lunge with a dumbbell or kettlebell | Keep the torso steady and the load close | People who already own the pattern | Higher stimulus, less suitable for casual two-minute sets |
Which version fits which day
Supported versions are the easiest to tuck into a two- to five-minute bodyweight break. They let you practice the pattern without turning the session into a battle for balance. If you're trying to build confidence, this is the place to start.
Tempo-controlled bodyweight reps are the default choice. They give you the cleanest blend of coordination, mobility, and lower-body effort without forcing you to babysit a weight. That makes them the best match for short daily sets.
Advanced versions belong in a real training block, not an impatient demo. A pause, a deficit, or extra load all increase the challenge, but they also expose sloppy alignment faster. Use them when the basic version looks boring, not when it still feels shaky.
If the movement isn't stable at bodyweight, adding load won't fix it. It just makes the error louder.
Mobility Limits, Joint Pain, and When to Adjust
The side lunge asks a lot from the ankle, hip, and groin. If those areas are stiff, the movement gets ugly fast. The fix is usually not “push harder,” it's “change the dose.”
Restricted ankle dorsiflexion is a common limiter, and tight adductors can make the loaded side feel blocked before the glutes and quads have a chance to do useful work. That doesn't mean you can't train the pattern. It means you need a smaller step, less depth, or support while the body learns the motion.
When it's useful effort versus when it's a bad sign
Effort feels like muscle work, stretch, or balance demand. Bad signs are sharper and more specific. Stop if you feel sharp pain, instability, swelling, a heel that keeps lifting, or a knee that repeatedly collapses inward. If symptoms linger, get the joint assessed instead of trying to outlast them.
For regressions, a chair or countertop can change the exercise enough to make it productive again. A supported sit-to-stand pattern is a sensible fallback when the side lunge isn't clean, and shorter steps with less depth are the first adjustment to try (bend and reach mobility guidance). Keep the knee generally tracking toward the toes, but don't turn that cue into a rigid rule that ignores pain or anatomy.
Two minimal-equipment options
- Countertop-supported lateral squat: Use one hand lightly for balance, shorten the step, and keep the torso tall.
- Chair-assisted sit-to-stand: Use it when the side lunge keeps provoking symptoms or the range just isn't there yet.
If pain shows up again and again, don't grind through reps. Recurring pain is a reason to slow down and get help, not a badge of toughness. The smartest progression is the one your joints can repeat tomorrow.
Fitting Alternating Side Lunges into Your Week
The best use of alternating side lunges is usually as a micro-set, not a long leg day replacement. That lines up well with exercise-snack style training, which recent reviews associate with better cardiorespiratory fitness in physically inactive adults, while also making clear that short bouts don't replace broader strength work or guarantee changes in body composition or blood lipids (exercise-snacks review).
A practical one-week start is simple: two training days, 3 sets of 6 to 8 alternating reps per day, and one rule for next week. If every rep stays clean, add a little range or one extra rep per side before you add more volume. If form slips, keep the same dose until it doesn't.
For the next session, use this checklist:
- Feet parallel and roughly hip-width
- Heel stays down on the loaded side
- Knee tracks toward the second toe
- Torso stays long, not folded
- Stop the set if pain or collapsing shows up
That's enough to make the movement useful without turning it into another program you avoid. For a related beginner-friendly lower-body approach, the squat challenge for beginners pairs well with this kind of short, repeatable work.
If you want a simple way to keep alternating side lunges consistent, SuperStrong is built for short bodyweight sets you can finish between tasks. Visit SuperStrong to turn a few clean reps into a routine you can stick with.