Hip Rock and Raise: A Practical Technique Guide
 15 min
You're on a mat beside the kitchen table, trying to follow a home workout, when the instructor calls for Hip Rock and Raise. You bring your feet together, open your knees, and rock backward. Then comes the confusing part: are you supposed to lift your hips like a bridge, curl your pelvis, or throw your legs upward?
The name doesn't make that obvious. Before you chase the workout's pace, it helps to identify the variation you're doing and decide what a controlled repetition should look like.
Table of Contents
- What the Hip Rock and Raise Actually Is
- How to Perform the Hip Rock and Raise Step by Step
- How It Compares to Glute Bridges and Pulse-Ups
- Three Failure Points That End the Set
- Programming the Drill Into a Weekly Routine
- Who Should Modify or Skip the Drill
- Logging the Drill and Taking It With You
What the Hip Rock and Raise Actually Is
Hip Rock and Raise is a program-specific core exercise, not a universally standardized movement. Its strongest documentation comes from P90X Ab Ripper X: a 2010 step-by-step exercise guide lists it as the routine's sixth movement and describes rocking backward from a butterfly-style seated position, then lifting the hips while keeping the knees apart and feet together.
That background matters when you search for instructions. Someone demonstrating a feet-planted hip bridge is showing a related floor exercise, but not the same sequence. Someone rocking backward on hands and knees is demonstrating a mobility variation, not the documented P90X movement.
A name isn't a training prescription
The P90X version belongs to the home-workout tradition: you need floor space rather than dedicated equipment. You can approach it as a core-control drill with a hip-mobility component, provided you don't mistake that description for a proven therapeutic benefit.
The available documentation doesn't establish an official invention date, a standardized clinical protocol, or measured calorie expenditure for this exact exercise. It tells us how the named movement is performed, not what every person will gain from it.
Practical rule: Identify the starting position before following any instruction labeled Hip Rock and Raise.
For training notes, a useful label is P90X Hip Rock and Raise, butterfly position. That distinguishes your exercise from bridges and hands-and-knees drills without claiming they're interchangeable. Treat the movement as something to learn, not a repetition total to survive.
How to Perform the Hip Rock and Raise Step by Step
Start with the butterfly-style P90X variation. Related Ab Ripper X form guidance places it within equipment-light floor training, but related hip-raise instructions shouldn't be treated as proof that every variation has identical mechanics.
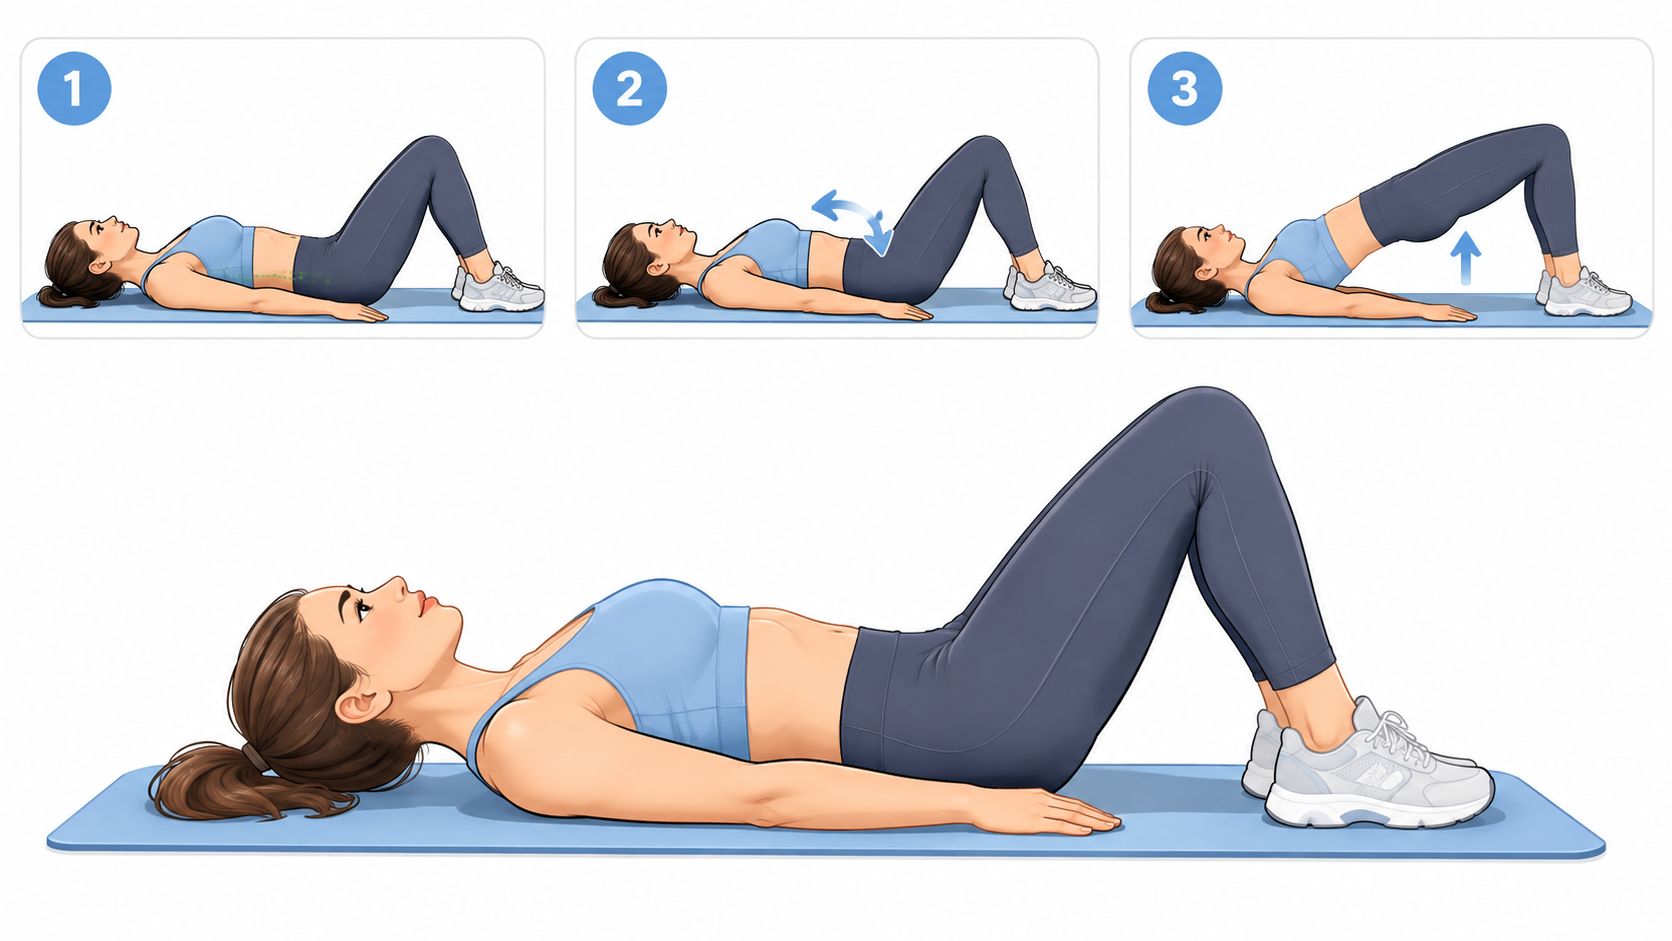
The illustration below shows a hip bridge, which is a comparison exercise, not the butterfly-position sequence.
Set up, rock, then lift
- Find your seated position. Bend your knees, bring your feet together, and let your knees open comfortably. Don't press them toward the floor.
- Prepare your trunk. Sit tall enough that your ribcage isn't flaring away from your pelvis. Brace gently, without holding your breath.
- Rock backward deliberately. Roll onto your back rather than throwing yourself down. Keep the butterfly shape as you transition.
- Lift the pelvis slightly. Once supported on your back, make a small, controlled pelvic curl that raises your hips. Keep your feet together and avoid kicking them toward your face.
- Lower and return. Let the hips settle gently, then rock back toward the seated position without snapping forward.
Try breathing out during the lift and breathing in as you lower. Pause only where you can remain steady; a higher lift isn't automatically a better repetition.
Don't try to keep your spine rigidly neutral throughout a rocking exercise. The distinction is between a deliberate pelvic curl and an uncontrolled collapse or lower-back arch.
The first-rep trap is using the back or momentum to manufacture height. Think about moving the pelvis under control, not pulling harder with the hip flexors.
Use the video as a movement reference, checking that its demonstration matches the variation you intend to practice.
How It Compares to Glute Bridges and Pulse-Ups
The easiest way to tell these exercises apart is to watch the feet. In a bridge, they stay planted. In Hip Rock and Raise, they remain together with the knees open. In the P90X Pulse-Up, both legs extend vertically.
Those differences change the task. Don't choose an exercise solely because each demonstration includes someone lifting their hips off a mat.
Hip Rock and Raise vs Glute Bridge vs Pulse-Up
| Movement | Start Position | Key Cue | Primary Demand | Best Used For |
|---|---|---|---|---|
| Hip Rock and Raise | Butterfly-style seated position | Rock, then curl the pelvis without kicking | Core control through a changing position | Practicing a coordinated floor-core sequence |
| Glute bridge | On the back, knees bent, feet planted | Raise the hips without arching the lower back | Hip extension | Bodyweight glute-strength practice |
| Pulse-Up | On the back, legs extended vertically | Lift the pelvis rather than swinging the legs | Pelvic-lift control while maintaining the leg position | A different core and hip-flexor holding challenge |
The demand descriptions are practical coaching distinctions, not a measured ranking of muscle activation across these exact exercises. There isn't enough evidence to declare one universally superior.
The bridge is a feet-planted hip-extension exercise
For a glute bridge, lie on your back with your feet about hip-width apart. Brace your trunk, gently tilt the pelvis backward, and lift until your shoulders, hips, and knees form a straight line.
Keep pressure through the planted feet, including the heels, rather than rising onto your toes. At the top, stop before your ribs flare and your lower back arches. Lower smoothly rather than dropping.
A beginner can use that straight-line position as an easily understood endpoint. You're not trying to rock into another posture or hold your legs in the air; you're practicing hip extension while maintaining trunk control.
That makes the bridge a sensible choice when your main goal is glute-strength practice. It can also be a simpler alternative when coordinating the rocking sequence is the immediate difficulty, although simpler doesn't mean appropriate for every painful hip or back.
Hip Rock and Raise adds a transition
In the P90X variation, you must organize the transition from sitting to lying back before performing the lift. A repetition can look energetic while still depending heavily on momentum.
Think of the difference between gently lowering a shopping bag and swinging it onto a counter. Both move the bag, but only one lets you stop wherever you choose. For this drill, being able to slow or pause the movement is a useful coaching test.
The open-knee position is another distinguishing feature. You don't need to force a wide butterfly stretch, but closing the knees to finish changes the variation you're practicing.
Choose this movement when you want to rehearse coordination and pelvic control, and the position feels comfortable. Don't assume the rocking phase gives it a special mobility benefit because it involves more motion.
Pulse-Ups keep the legs extended
The P90X guide referenced earlier distinguishes Pulse-Ups by their vertically extended legs. They share a pelvic-lifting action with Hip Rock and Raise, but they don't share its butterfly setup or seated rocking sequence.
Holding the extended-leg position creates a different task for the hip flexors and trunk. That's a mechanical distinction, not evidence that Pulse-Ups produce a superior abdominal workout.
- Choose a bridge when you want a clear feet-planted hip-extension exercise.
- Choose Hip Rock and Raise when you want the butterfly-position rocking and pelvic-lift sequence.
- Consider Pulse-Ups when you can comfortably maintain the vertical-leg position without swinging.
You don't have to master every variation. Choose the movement that matches your goal and that you can perform without the warning symptoms described below.
Three Failure Points That End the Set
A set ends when you can no longer perform the movement you intended. For Hip Rock and Raise, use the following coaching checks, rather than treating them as a validated clinical scoring system.
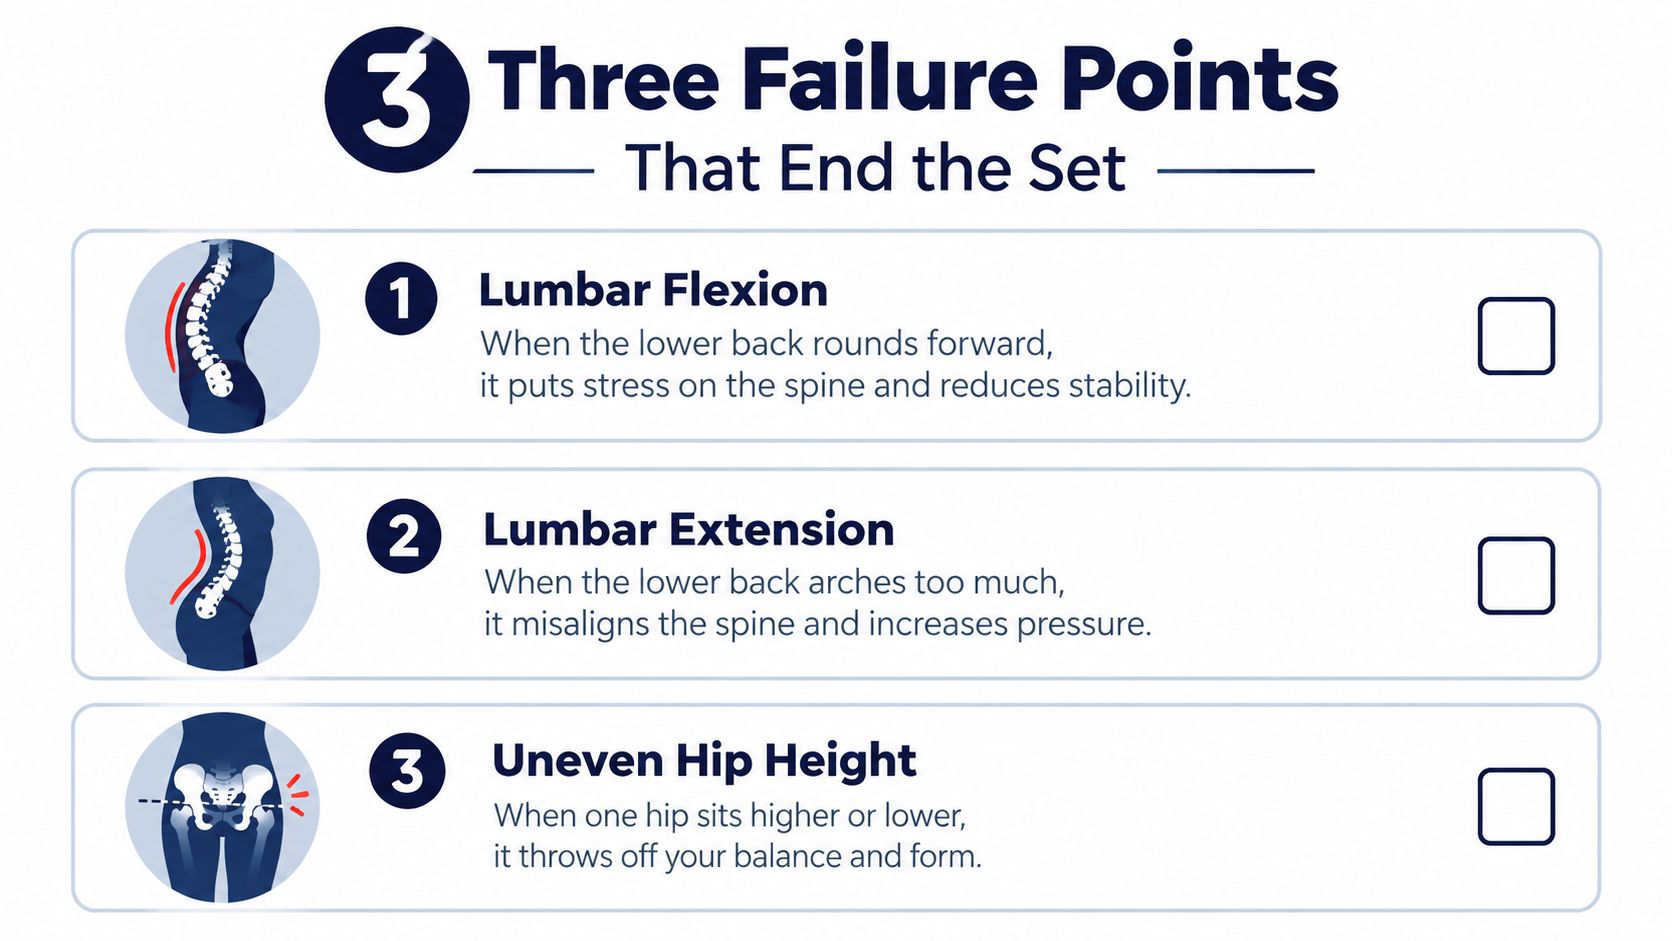
The visual highlights spinal-position changes and uneven hip height. The written checklist also addresses the butterfly position.
Distinguish movement from compensation
- Uncontrolled spinal motion. A pelvic curl involves some rounding, so lumbar flexion alone isn't an automatic failure. Stop when you collapse abruptly, arch to create extra height, or can't control the descent.
- Pelvic rotation. If one hip lifts ahead of the other, or your waistband visibly tilts, you're no longer performing a centered raise. Reduce the lift rather than twisting through it.
- Loss of the butterfly shape. If your knees close because you're struggling to finish, end the set or reset. Don't force them outward to rescue a repetition.
A nearby mirror can help you notice uneven hip height, provided you don't twist your neck to watch it during the movement. You can also check a recording afterward; look for whether the last repetitions resemble the first clean ones.
Reset before repeating
After a technical failure, put your hips down and pause. Try a smaller lift or a slower transition only if the movement remains comfortable.
Quality checkpoint: If slowing down makes the repetition impossible, speed was probably helping you finish it.
These checks don't diagnose an injury. They give you a practical stopping point before fatigue turns the drill into a different movement. Pain requires a separate decision, not another attempt to perfect your technique.
Programming the Drill Into a Weekly Routine
Don't transfer a repetition prescription between exercises just because their names sound alike. The butterfly P90X movement, a quadruped mobility sequence, and a bridge need separate entries in your plan.
Match the dose to the variation
For a hands-and-knees rock-and-raise mobility sequence, a conservative coaching starting point is 1–2 sets of 6–10 slow cycles per side. This isn't a validated dose for the P90X variation; related hip-rehabilitation literature addresses broader exercise therapy and movement retraining, with protocols varying by diagnosis.
For a supine bridge, a practical starting benchmark is 2–3 sets of 8–15 controlled repetitions, 2–4 days per week, informed by the broader hip-extension exercise context rather than a universal app protocol; the hip-thrust systematic review examines muscle activation and performance, not guaranteed completion rates.
For the butterfly drill, begin with a short technique set and stop at the first unresolved form failure. Add a steadier pause before adding more repetitions.
Use the visual as an organizational reminder, not an automatic loading schedule.
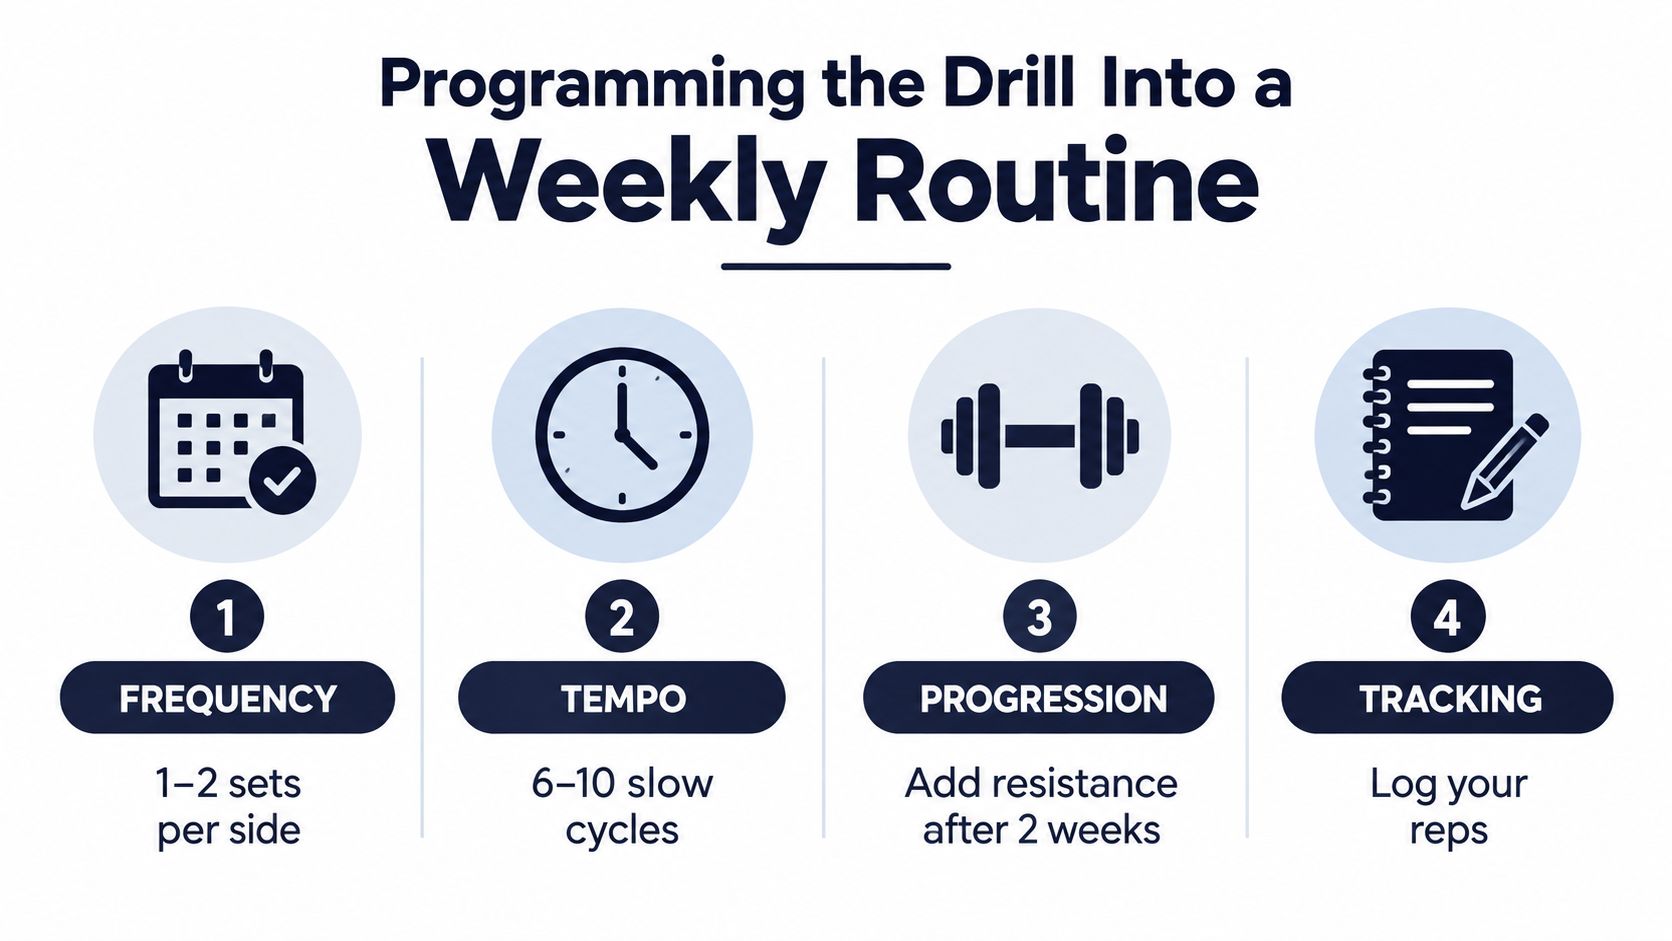
Progression caution: Don't add resistance merely because a calendar interval has passed. Comfortable, repeatable control matters more than elapsed time.
Keep walking and other general movement in your week. If you're also following a beginner squat challenge, treat this drill as an optional accessory, not another compulsory daily target. Don't turn rest days into extra hard bridge sessions, and don't assign this specific movement a proven immune or calorie-burning benefit.
Who Should Modify or Skip the Drill
Being an abdominal exercise doesn't make Hip Rock and Raise suitable for everyone. Your symptoms matter more than whether you can copy the demonstration.
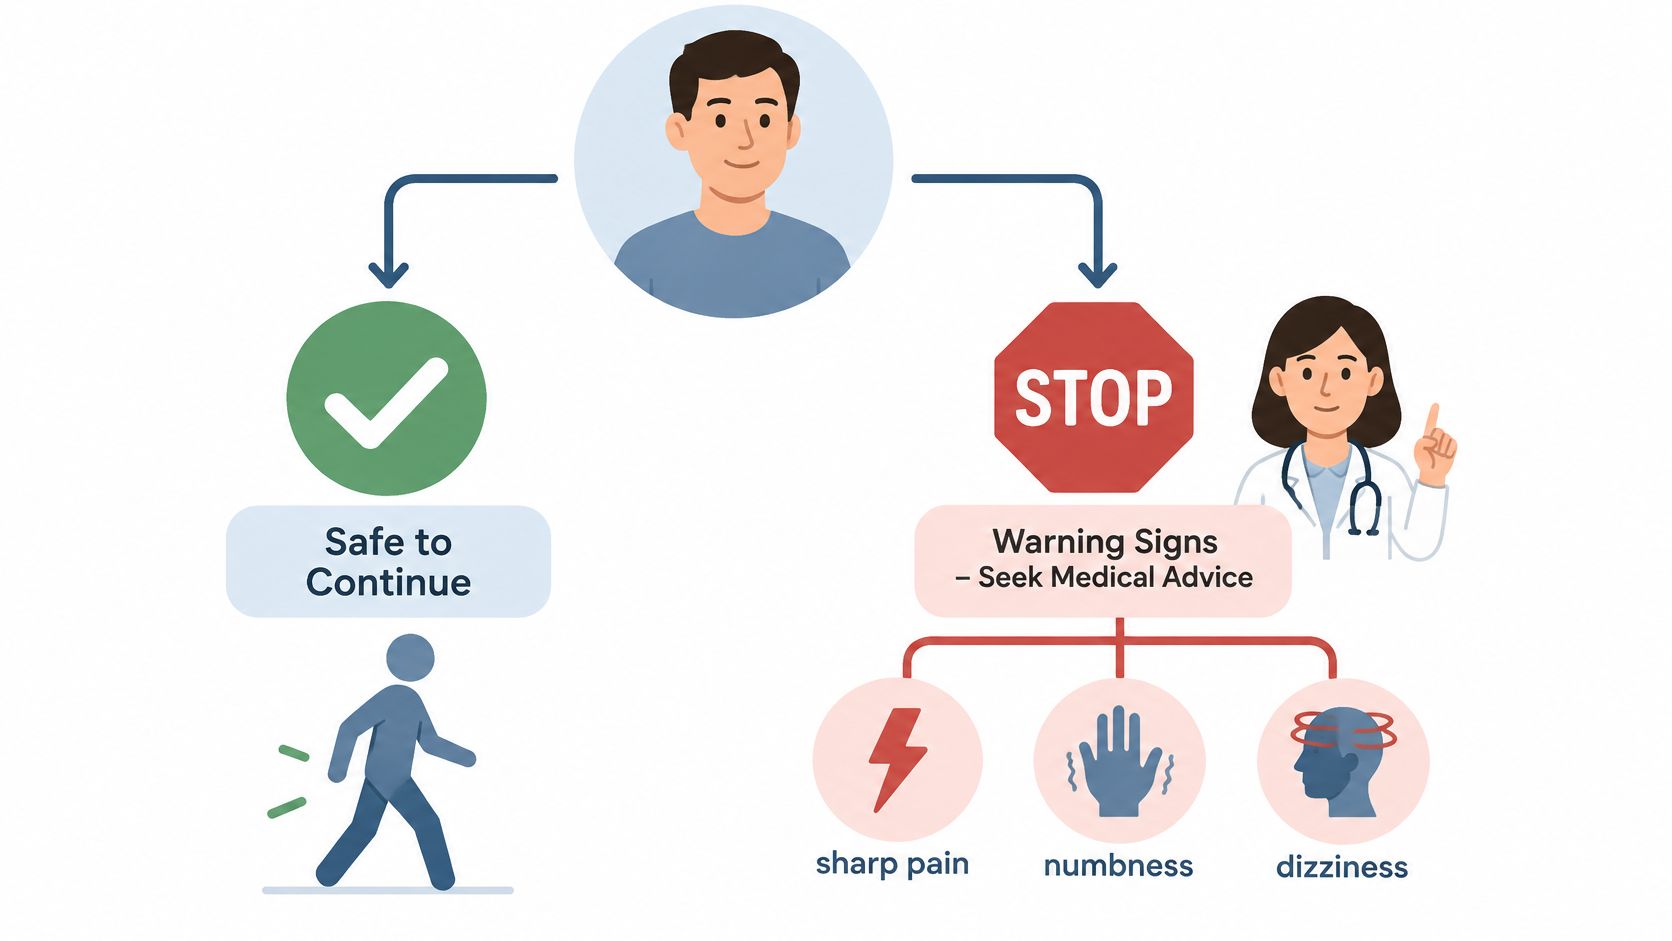
Hip-raise safety guidance flags sharp or persistent low-back pain, radiating numbness or tingling, and front-of-hip pain as reasons to stop and seek professional assessment. It also supports beginning gradually rather than forcing a difficult range.
Use this symptom distinction before attempting another set.
Decide by what you feel
- Ordinary muscular effort. Abdominal fatigue or a mild muscular burn may occur. Continue only while you can maintain your chosen movement standard.
- Restricted but painless movement. Reduce the rocking distance or lift height. Slow down and let the knees sit at a comfortable angle instead of pressing them wider.
- Pinching or sharp pain. Stop. Don't stretch harder, bounce, or assume stronger abdominal bracing will solve it.
- Traveling or lingering symptoms. Shooting pain, numbness, tingling, or symptoms that persist after the set warrant professional assessment before you repeat the drill.
A regression should reduce the problem
If the seated transition is awkward but painless, hands behind the torso can help you settle into the starting position. That support is for setup, not for pushing through a painful rocking phase.
A smaller pelvic lift may be enough to practice control. A supine bridge is another candidate, but only if its feet-planted position is comfortable; swapping exercises isn't a guarantee of safety.
With a history of hip or back problems, ask a qualified clinician whether this movement fits your situation. The name doesn't establish that it treats hip pain. For a broader starting point, use bodyweight training for beginners to consider alternatives rather than making this drill mandatory.
Logging the Drill and Taking It With You
Your training record should describe what you did, not just the number you hoped to finish. A smaller total of controlled repetitions is more informative than a larger total that mixes clean lifts, partial attempts, and momentum-driven finishes.
Use a distinct exercise label and a short note about the variation. If your tracker doesn't support Hip Rock and Raise, don't record it as glute bridges; keep a separate written entry instead.
A floor-side checklist
- Position, Feet together, knees comfortably apart, with the butterfly variation clearly identified.
- Control, Deliberate rocking, a manageable pelvic lift, and a quiet return.
- Technique, No unresolved spinal collapse, twisting, or loss of the intended knee position.
- Symptoms, No warning signs that call for stopping or assessment.
- Record, Count completed repetitions separately from partial or compensated attempts.
A bodyweight workout journal can help you preserve those details. A note such as smaller lift, smooth return, stopped when hips began twisting tells you more about the next session than hard workout.
Make the next attempt repeatable
Keep the same variation and similar conditions when checking progress. Look for a smoother transition, a more deliberate pause, or less need to reset, rather than assuming progress must mean a higher count.
If you share workout totals, keep the counting standard consistent. Record partial efforts without presenting them as technically complete repetitions.
Tonight's useful goal is straightforward: practice a comfortable short set, stop when control or symptoms tell you to, and write down what happened. Treat this as a control drill, not an exercise with a validated calorie estimate.
SuperStrong offers an iPhone app that organizes short at-home bodyweight sets into a shared visual wall with friends. Visit SuperStrong to build a simple tracking routine around supported movements such as glute bridges, while keeping your Hip Rock and Raise technique notes separate and honest.