Push Up Position Plank: Alignment, Mistakes and Fixes
 13 min
If you can stay at the top of a push-up, why might you still struggle to perform one? The difference isn't just effort. A push up position plank teaches you to support and brace your body, while a push-up asks you to maintain that control through movement. Start by learning what a clean hold actually feels like, rather than chasing the clock.
Table of Contents
- What the Push Up Position Plank Is and Who Uses It
- How to Set Up the Push Up Position Plank Step by Step
- Common Mistakes and How to Correct Them
- Push Up Position Plank vs Forearm Plank
- What the Position Trains and What It Cannot Replace
- Progressions That Build Strength Instead of Hold Time
- Choose the Position for Your Goal and Log Clean Reps
What the Push Up Position Plank Is and Who Uses It
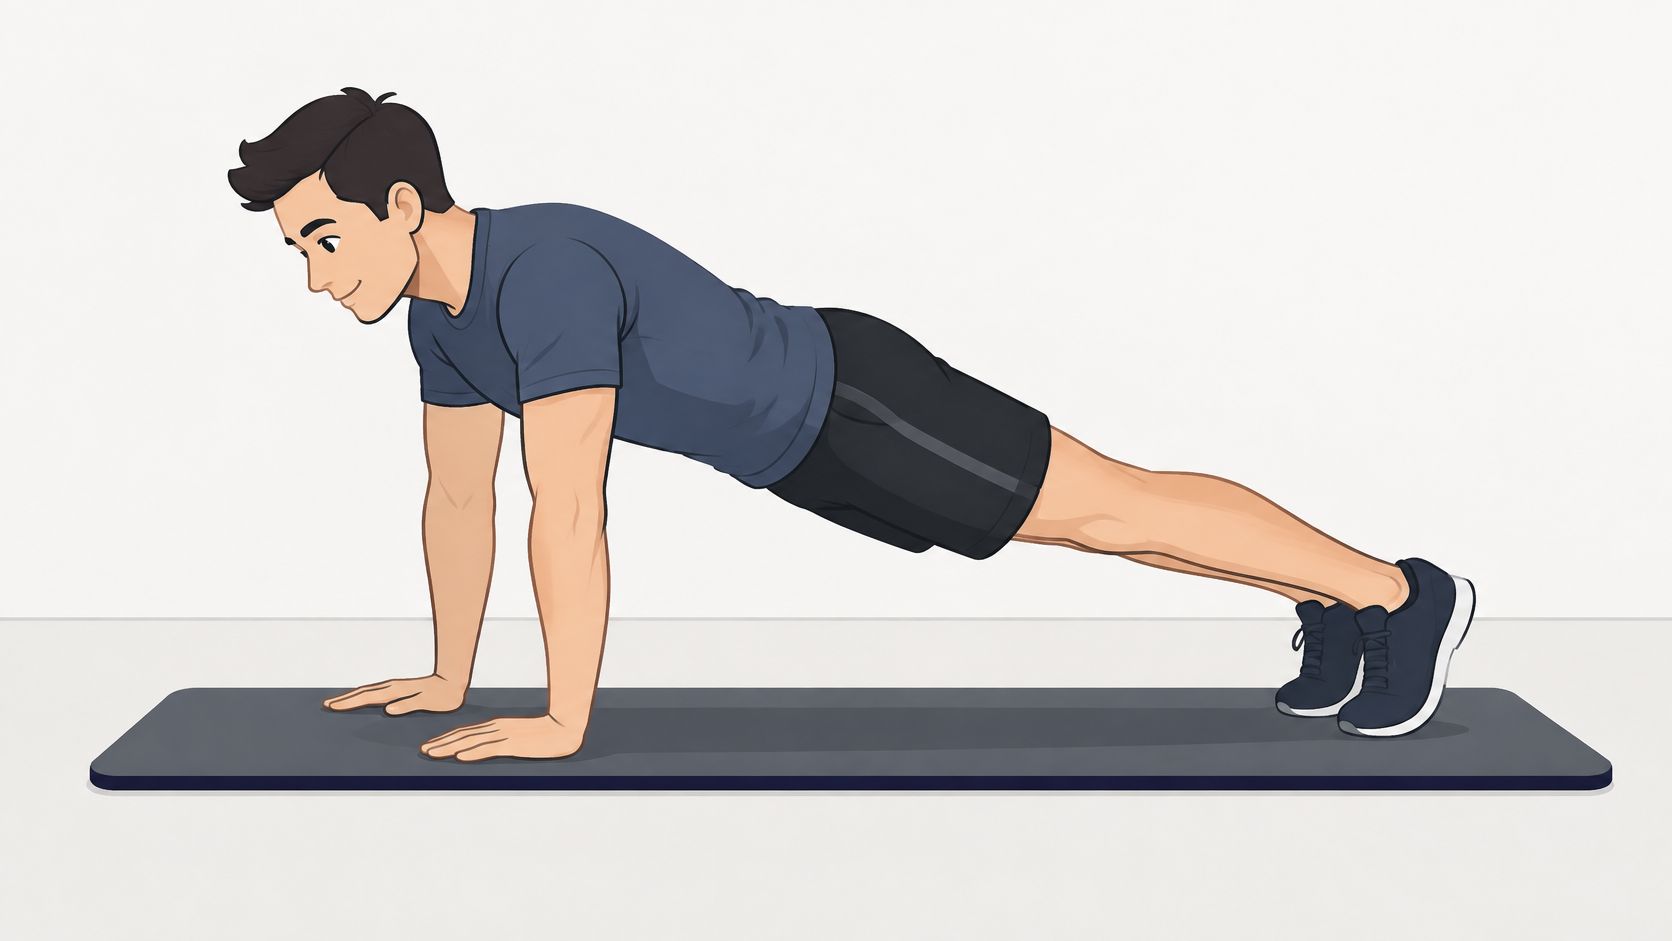
The push up position plank is a hold with your body aligned from head to heels, your arms straight, your hands beneath your shoulders, and your toes on the floor. It's also called a high plank, and it matches the starting position of a push-up.
Think of a wooden board resting between supports. Your hands and toes provide the supports, but your body isn't naturally rigid like wood. You create that stiffness by coordinating your muscles so your middle doesn't bend toward the floor.
The side view makes the intended body line easier to recognize.
This is an isometric exercise: you produce force while holding the position rather than moving through a repetition. Your abdominals and other trunk muscles work alongside your shoulders, upper back, chest, triceps, glutes, and quadriceps.
A study comparing stable-surface and suspension exercises measured abdominal and trunk muscle activation during planks and found greater oblique activation when suspension instability was added. That supports treating the exercise as a coordinated muscular task, not merely an arm-endurance test. It doesn't establish that an unstable version produces better long-term results for everyone.
Coaching cue: Stay firm through your body without becoming rigid in your breathing.
Beginners use this position to become comfortable supporting themselves before attempting push-ups. It also suits home exercise breaks and practice sessions focused on trunk control. You don't need suspension straps or extra weight to start, just a surface that lets you hold your alignment.
How to Set Up the Push Up Position Plank Step by Step
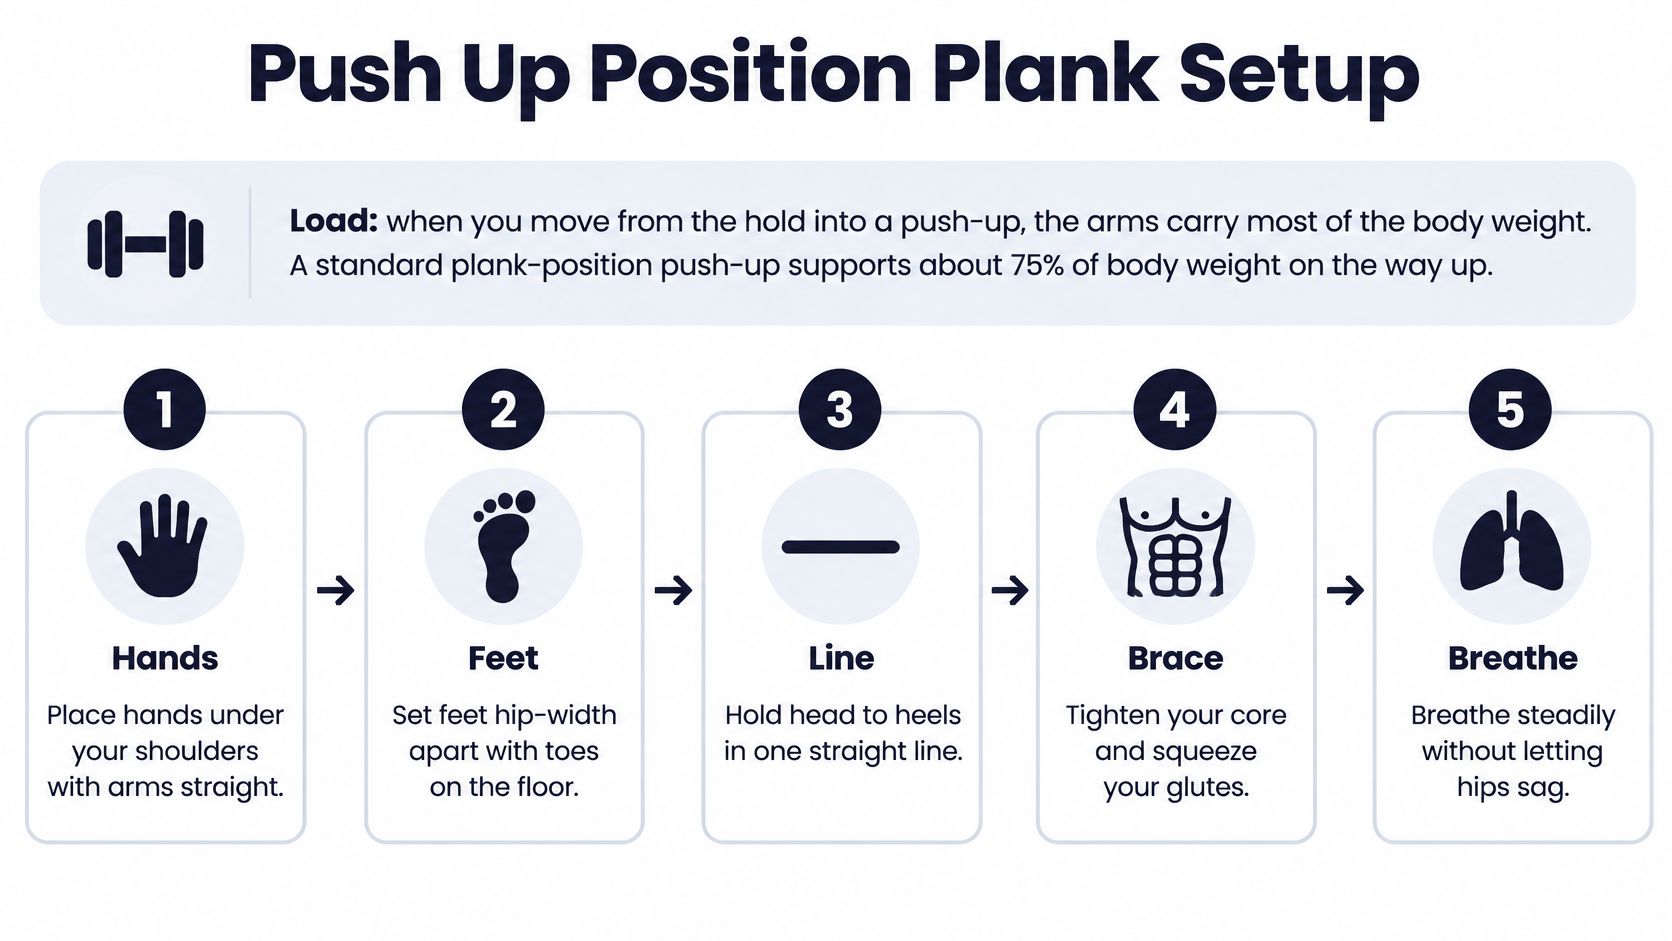
Hand placement matters because this position can become demanding quickly. During a standard plank-position push-up, approximately 75% of body weight is supported during the upward phase and 69% during the downward phase, according to Cleveland Clinic's push-up guidance. Those figures describe the moving exercise, not a measured percentage for every static hold.
Use this visual as a setup reminder, then check each part deliberately.
-
Plant your hands. Start on hands and knees. Spread your fingers and place your hands beneath or slightly outside your shoulders. From the side, check that your wrists sit under your shoulders rather than well ahead of them.
-
Step your feet back. Set your feet about hip-width apart, with your toes tucked. Extend your legs until your head, trunk, and heels follow a continuous line. Don't deliberately lift your hips to make the position easier.
-
Brace your middle. Gently draw your lower ribs toward your pelvis and tighten your abdomen as though preparing for a light punch. You should still be able to breathe without releasing the brace.
-
Engage your legs. Squeeze your glutes and straighten your knees without forcing them backward. This helps keep your pelvis from tipping and your lower back from arching.
-
Set your head. Look at the floor just ahead of your hands. Keep your chin comfortable, not lifted toward the wall or tucked tightly into your chest.
-
Push the floor away. Keep your elbows straight without jamming them backward. Let your shoulder blades spread gently across your upper back while keeping your shoulders away from your ears.
Alignment checkpoints
| Body part | Target position | Quick self-check |
|---|---|---|
| Hands | Under or slightly outside shoulders, fingers spread | Wrists beneath shoulders from the side |
| Head and neck | Neutral, gaze just ahead of hands | Ears aligned with shoulders, chin not lifted |
| Shoulders | Floor pushed away, shoulder blades gently spread | No shrugging toward ears |
| Trunk | Ribs drawn down, abdomen braced | No rib flare, breathing still possible |
| Hips and pelvis | Following the shoulder-to-ankle line | No sag or upward pike |
| Legs and feet | Knees straight, glutes engaged, toes tucked | Heels follow the body line |
Use a side-view phone recording to check your whole position without turning your head. For a moving demonstration of the setup, watch the exercise below.
Set the line before starting the clock. Time spent adjusting your feet or recovering your brace isn't the same as time spent holding the intended position.
Common Mistakes and How to Correct Them
One of the most consequential mistakes is extending a hold after your hips begin to sag. You may still feel effort, but you're no longer maintaining the trunk position you intended to train. More time doesn't make that a better set.
Treat a visible change in shape as feedback. It may mean you need a clearer cue, more recovery, or an easier version, not greater determination.
| Mistake | Likely cause | Fix |
|---|---|---|
| Hips sag toward the floor | Abdominals fatigue or brace releases | End the hold, re-brace, and engage the glutes |
| Hips pike upward | Trying to continue beyond current capacity | Reset the body line and use a shorter hold |
| Head drops or neck cranes | Losing neck control or looking forward | Look just ahead of the hands, with chin comfortable |
| Shoulders shrug toward ears | Tension gathers around the neck | Push through the hands and gently spread shoulder blades |
| Elbows flare during a push-up or hands sit too far forward | Hand placement doesn't support a controlled press | Reset hands under or slightly outside shoulders |
| Breath is held | Bracing becomes an all-out squeeze | Breathe steadily while maintaining abdominal tension |
When a correction isn't enough
Suppose you reset your hips, but they drop again almost immediately. Repeating the cue won't necessarily solve the problem. Put your hands on a stable counter or bench so you can practice the same body shape with a more manageable demand.
Choose a surface that won't slide, tip, or compress under your hands. A firm counter is preferable to a soft sofa cushion.
Stop when you can't restore the intended position without compensating somewhere else.
Muscular effort is expected; sharp pain, joint pain, or numbness isn't a reason to keep practicing. Stop and adjust the exercise, and seek qualified advice if symptoms persist.
Push Up Position Plank vs Forearm Plank
| Factor | Push up position plank | Forearm plank |
|---|---|---|
| Support | Straight arms, hands under shoulders | Forearms down, elbows bent beneath shoulders |
| Load on the arms | Supported through hands and straight arms | Supported through elbows and forearms |
| Shoulder demand | Maintain shoulders over hands | Maintain shoulders over elbows |
| Beginner difficulty | Can be reduced by elevating hands | Can be reduced by resting knees |
| Transfer to push-ups | Direct practice of the starting position | Practices bracing without the hand-supported position |
| Wrist comfort | Wrist extension under load | Wrists can remain neutral |
| Equipment | Floor, or stable elevated surface | Floor, with padding if needed |
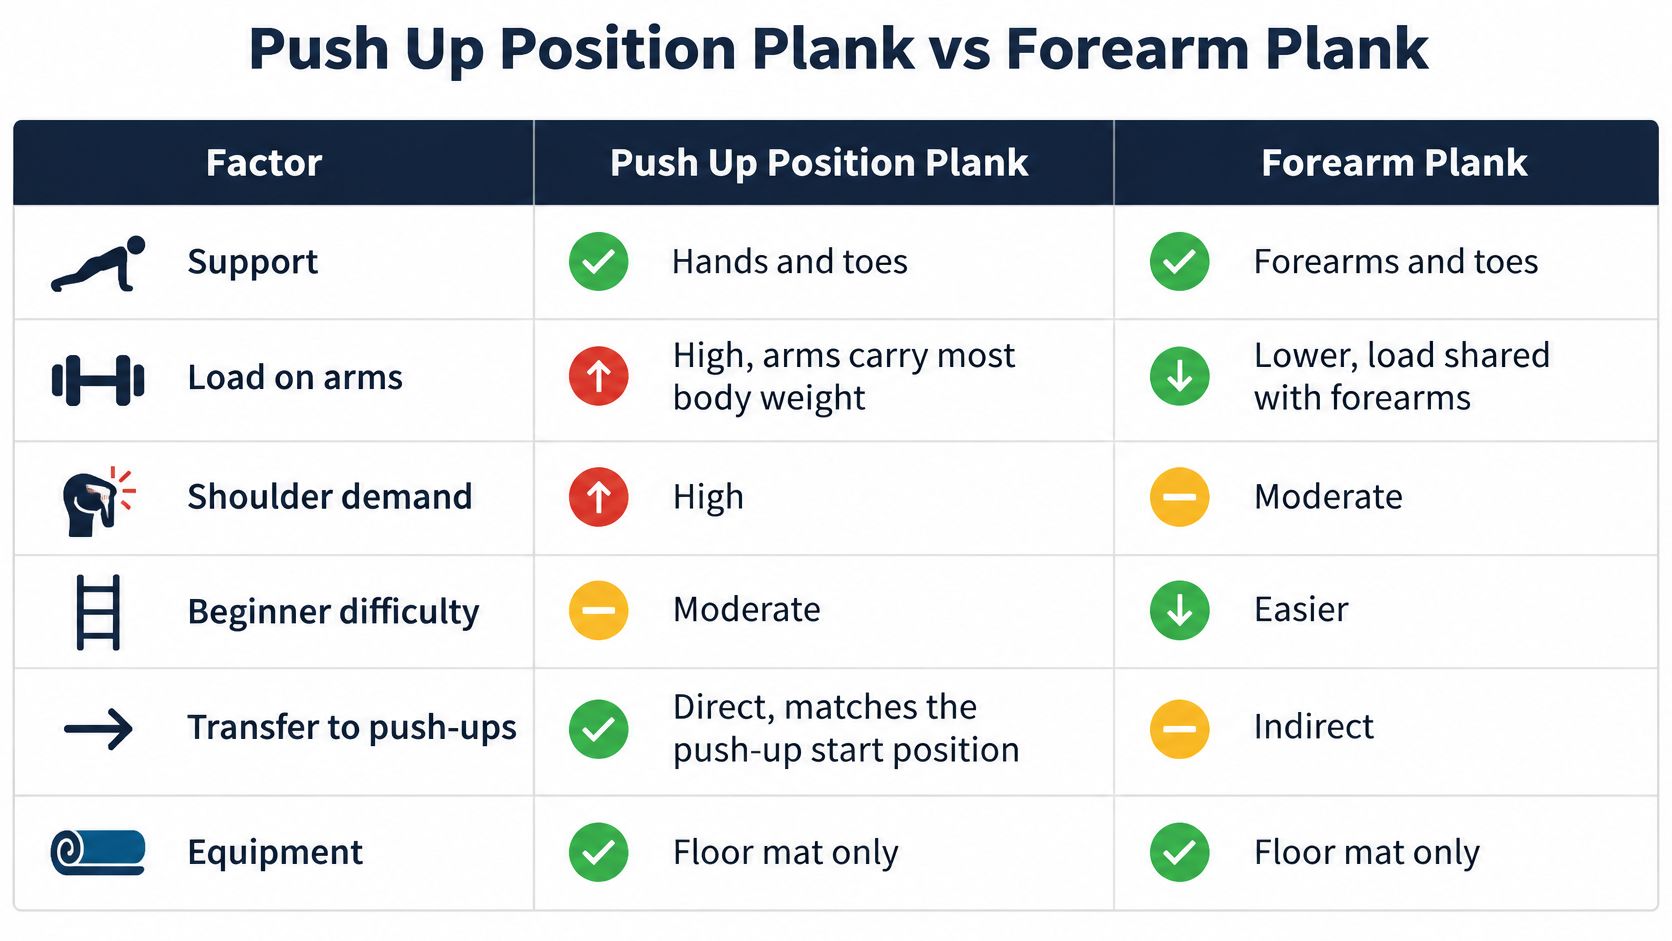
Choose between these holds by considering what you're practicing and what feels comfortable, not by assuming one is universally harder. Both require active trunk control, but they place you on different supports.
For push-up preparation, the high plank is more specific. You practice distributing pressure through your hands, keeping your elbows straight, and supporting yourself in the position you'll return to after each press. A forearm plank doesn't provide that same hand-and-arm practice.
The comparison graphic highlights the practical differences, although individual difficulty won't always follow a simple easier-or-harder ranking.
What stays the same
A forearm-plank protocol published in Scientific Reports specified elbows flexed at 90 degrees, straight body alignment, and no pelvic drop or trunk rotation. Those alignment requirements matter more than merely reaching the floor with your forearms.
The forearm version can be useful if loaded wrist extension is uncomfortable. However, changing supports doesn't guarantee that your shoulders or trunk will find the exercise easy. Judge the version by whether you can maintain its intended position comfortably.
Don't interpret forearm support as removing upper-body load. It changes where you contact the floor. If either variation causes pain, choose another setup rather than forcing the comparison.
What the Position Trains and What It Cannot Replace
Holding your body still isn't the same as pressing it away from the floor. Consider holding a door closed against wind compared with repeatedly opening and closing a heavy door. Both require effort, but they ask you to produce and control force differently.
That distinction explains why an easy plank doesn't guarantee a successful push-up. Isometric endurance and dynamic pressing capacity overlap, but you also need practice lowering and lifting your body under control.
Evidence about short activity breaks needs similar care. The British Journal of Sports Medicine discussion of exercise snacks describes support for cardiorespiratory fitness, while findings for muscular strength, body composition, and blood lipids remain inconsistent. That's not evidence that brief static planks alone deliver those benefits.
Match the exercise to the goal: Practice holding when you need position control. Practice pressing when you need pressing capacity.
Use a practical division:
- For bracing practice: Choose a hold that lets you resist unwanted trunk movement while breathing.
- For upper-body strength: Include controlled incline push-ups or floor push-ups that you can progressively challenge.
- For advanced coordination: Treat movements such as renegade push-ups as later options, not shortcuts around basic pressing practice.
The World Health Organization's physical-activity guidance recommends strengthening all major muscle groups on at least 2 days each week. A plank belongs alongside movements such as squats, rows, and hinges, not in place of a varied routine.
If your hold feels comfortable but your press remains difficult, add appropriately scaled dynamic work rather than only extending the hold.
Progressions That Build Strength Instead of Hold Time
Progress by measurable overload, not an arbitrary endurance target. Change the task only when you can manage the current version without sacrificing its defining features.
The ladder below is a practical route, not a mandatory sequence. Someone with comfortable wrists and good hand-supported control may not need a forearm stage.
| Stage | Starting workload | Move up when |
|---|---|---|
| Hands on a counter or bench | Short holds with full recovery | The body line stays steady throughout |
| Hands on a low sofa frame or step | Repeat clean holds on a firm surface | Hand placement and shoulder position remain consistent |
| Floor plank, forearms or hands | Holds ending before technique changes | You finish without hip sag or breath-holding |
| Incline or knee push-up | Manageable sets of controlled repetitions | You maintain consistent depth and tempo |
| Full floor push-up | Small sets of clean repetitions | The workload feels controlled before harder variations |
Use a readiness rule
A practical application of ACSM's resistance-training guidance is to increase difficulty after completing the current workload comfortably across two consecutive sessions, while allowing at least 48 hours between demanding sessions for the same musculature. That gives you a repeatable decision rule rather than relying on enthusiasm after an unusually good set.
For pressing exercises, first make your repetitions consistent. Keep the same hand placement, body alignment, depth, and tempo so you're comparing like with like. Then add manageable volume before moving on to a more demanding variation.
Lowering an incline changes the task meaningfully. Shortening rest also increases session demand, but don't reduce recovery so aggressively that your next set loses quality.
A controlled walk-out exercise can add practice entering and leaving hand support. Shoulder taps and leg lifts should wait until you can prevent your pelvis from rocking when a support leaves the floor.
Choose the Position for Your Goal and Log Clean Reps
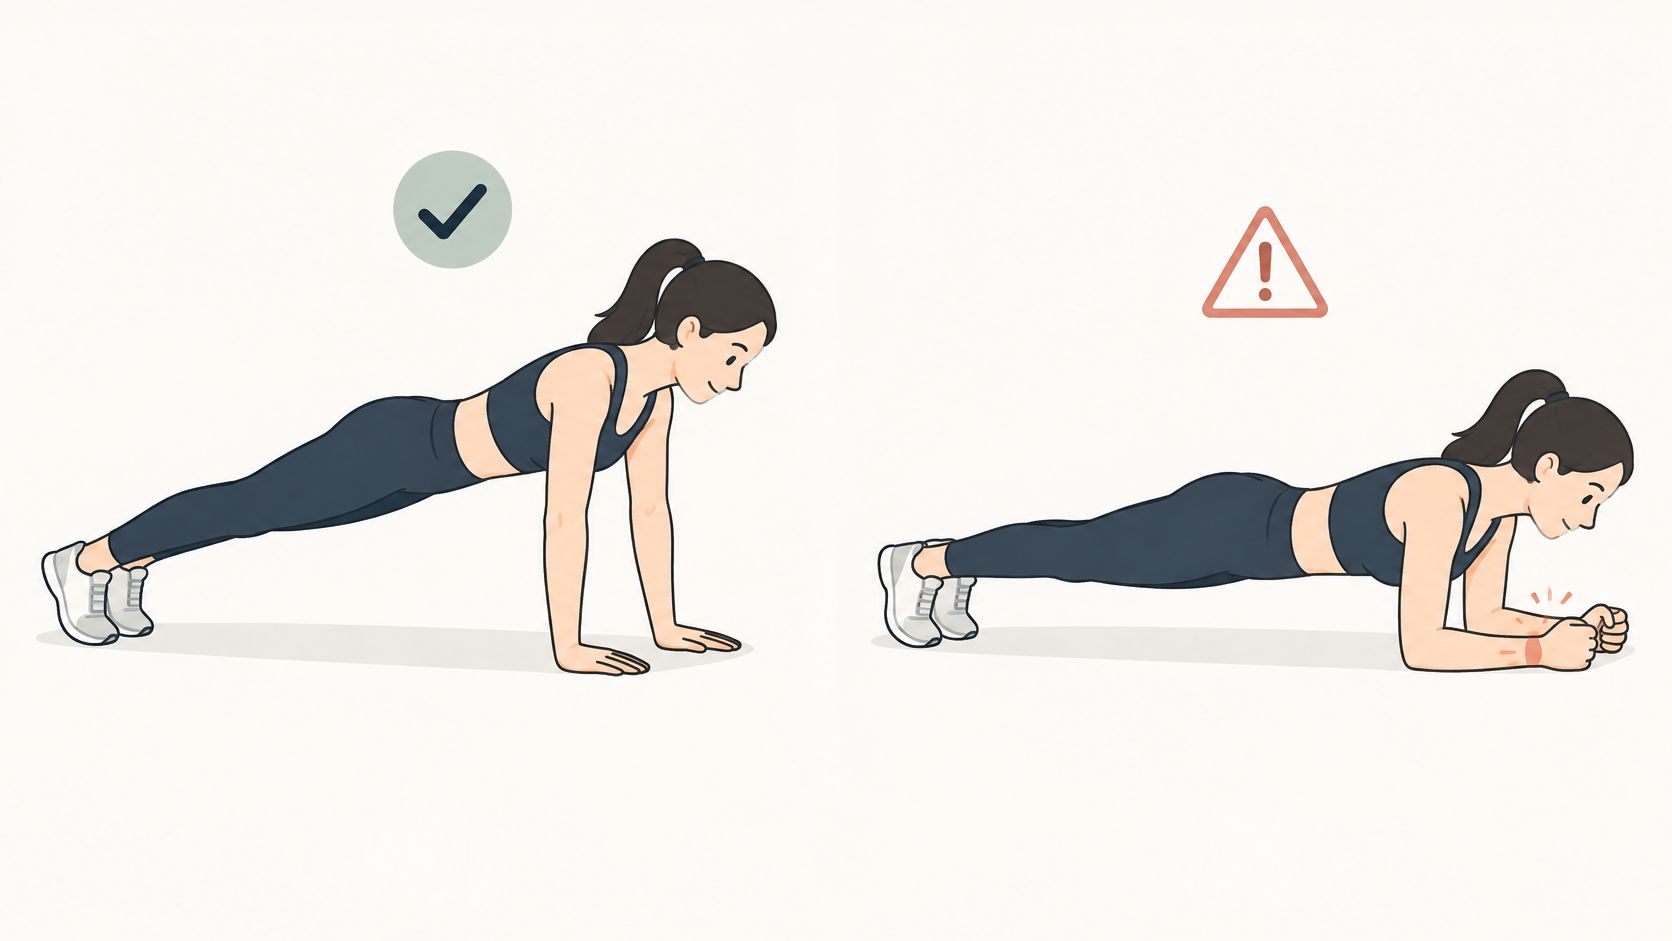
Which variation fits your goal? Choose the hand-supported plank to practise the push-up starting position. Forearm support avoids loaded wrist extension, while incline push-ups let you practise pressing through a manageable range.
Raised hands are a useful starting point. Feet-raised and suspension variations can come later, once you control the floor version and have a reason to increase difficulty. Use form images to check alignment cues, not to assume one plank style is always right and another wrong.
Record comparable work
A notebook or bodyweight workout journal should record which variation you performed, not just your total. Note the support height for incline work, hold duration for planks, and clean repetitions for presses.
Count only repetitions with your intended alignment, consistent depth, and steady tempo. If you shorten each rep to raise the total, that number no longer shows the same level of work.
Choose a manageable variation, set a clean target, and record what you complete. Check your alignment again before increasing the difficulty.
SuperStrong is an iPhone app for logging short bodyweight sets as tiles on a shared wall with up to four friends. Download it from the App Store to record clean push-up sets and make regular home practice visible alongside your friends' efforts.