How to Use a Step Up Chair Without Getting Hurt
 12 min
Stop treating any dining chair as a free stair. That's the most popular advice about a step up chair, and it's the fastest way to turn a useful exercise into a wobbly gamble. Use the lowest stable platform you have, keep support within reach, and earn faster or taller reps only after quiet, controlled ones look boring.
Table of Contents
- Why a Chair Step-Up Needs a Safety Check
- How to Choose a Stable Step Up Chair
- Performing a Controlled Chair Step-Up
- Beginner Modifications and Stop Rules
- Fitting Brief Step-Ups into a Home Routine
- Start Your Next Step Up Chair Session
Why a Chair Step-Up Needs a Safety Check
You're between calls, standing in your kitchen, looking at a dining chair. It seems harmless. Step up, step down, get your heart rate up, done. That thinking misses the actual risk. A stair is fixed, wide, and built to be loaded repeatedly. A household chair can slide, tip, or sit at an awkward height, and the descent gives you less room to recover if your balance shifts.
That doesn't make step-ups a bad idea. It makes platform choice part of the exercise. Step-up training has a documented role in improving mobility and lower body function, and a 2025 randomized trial in 32 community dwelling older adults found significant improvements in functional mobility, lower extremity strength, and walking speed after training 50 minutes per day, three days per week, for six weeks. Both surface groups improved, and gains remained evident one month later. The soft surface group also showed greater improvements in dynamic balance and strength after six weeks.
What the evidence does not license
Those results don't turn any chair into training equipment. The trial used a structured, progressive program, not improvised reps on furniture that's already unsteady. It also cites a meta-analysis reporting that volitional and reactive step training can reduce fall rates by approximately 50%, as reported in that same trial publication. That's a reason to take stepping seriously, not a reason to skip setup.
Recent exercise snack work creates the same trap. Short stair bouts have shown promise, but that stair climbing research generally used stairs, supervised protocols, or specified step counts, not an ordinary kitchen chair between meetings. Don't transfer stair results to a chair without accounting for stability, seat height, and what happens if you miss your footing.
My rule: "No equipment" doesn't mean no safety standard. If the platform isn't stable, you don't have a workout, you have a hazard.
Get clinical clearance first if you have a chronic knee, hip, ankle, balance, or cardiovascular condition. That's not alarmist. It's basic sequencing. Capacity comes before reps, and a stable surface comes before intensity.
How to Choose a Stable Step Up Chair
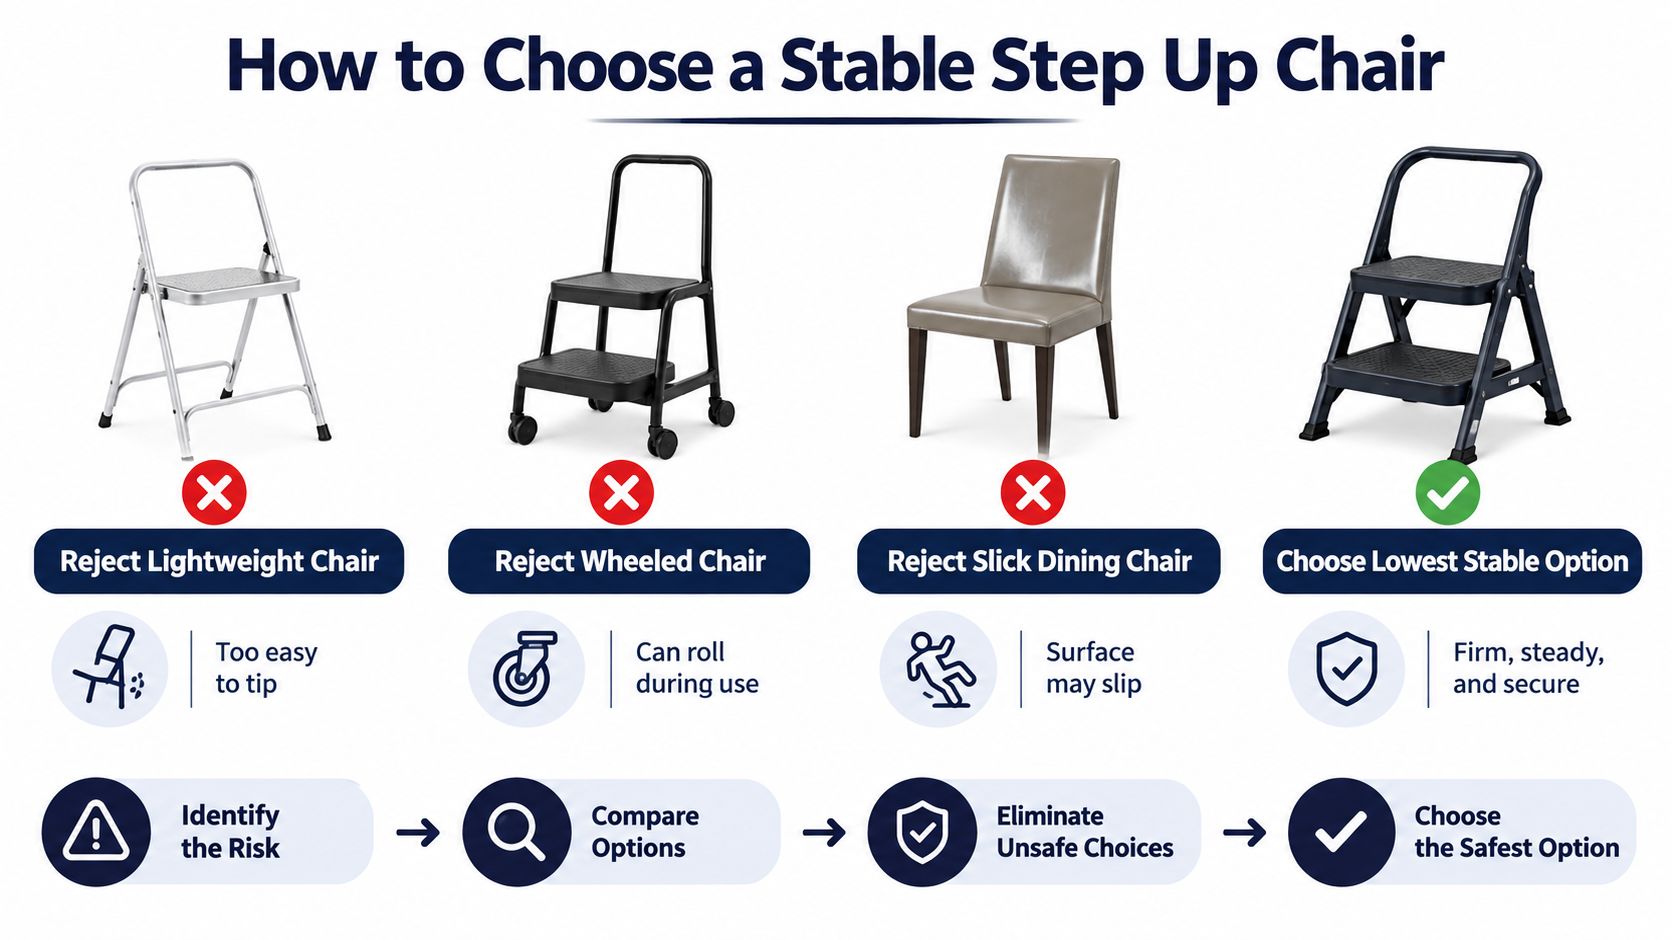
Pick a purpose built, non slip step or a low stair first. A chair is your last choice, not your default. If you do use one, it must be heavy, firm, and unable to slide or tip when you load it from the front. Lightweight dining chairs, wheeled chairs, and slick seats fail immediately.
Use the lowest option that still lets your entire lead foot sit flat. Guidance for deconditioned users starts at approximately 4 inches, reserves higher platforms for experienced users, and keeps the loaded knee from flexing beyond 90 degrees, as set out in National Ageing Research Institute step-up guidance. If the platform already feels tall while you're standing still, it's too tall.
Which Platform to Use First
| Option | Best use | Main risk | Choose it when |
|---|---|---|---|
| Low stair or purpose built step | First choice for repeat sets | Too much height for beginners | You want a fixed, full foot surface |
| Heavy non sliding chair | Backup when no step exists | Sliding, tipping, awkward descent | It cannot move and sits beside support |
| Sit to stand | Low demand strength work | Using momentum to stand | Balance or knee tolerance is limited |
| Marching in place | Movement break | Drifting into sloppy posture | You need activity without elevation |
A reader choosing a better fixed platform may also want a step deck workout option for home training instead of forcing furniture to do a job it wasn't built for. That's often the smarter purchase free decision too, since one low stair beats three questionable chairs.
Run a yes or no setup test before your first rep.
- Movement test: Push and pull the chair. Any slide, rock, or tip means stop.
- Foot test: Place your whole lead foot down. A hanging heel means the surface is wrong.
- Support test: Put a wall or railing within easy reach for early sessions.
- Height test: If your knee drives deep or your trunk folds to start, lower the platform.
If it fails one test, don't negotiate. Choose the stair, the sit to stand, or marching in place.
Performing a Controlled Chair Step-Up
Start beside a wall, not in the middle of the room showing off your balance. The image below shows the basic idea, but your standard is stricter than just getting on top of the chair. You're training control on the way up and, just as much, on the way down.
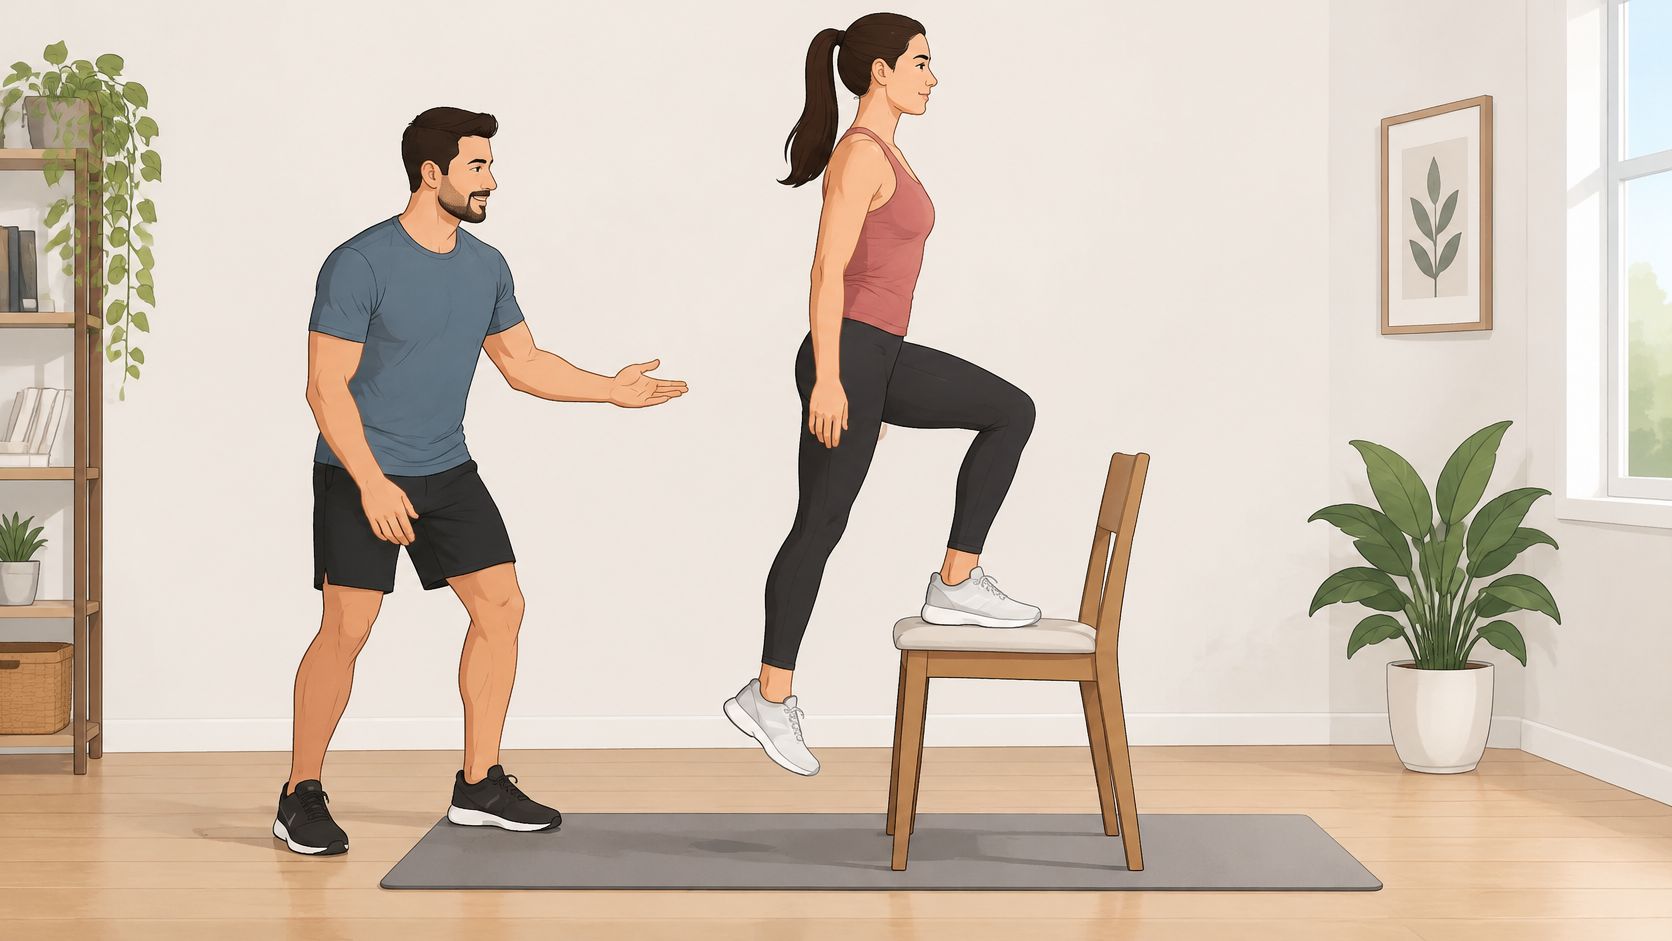
Place your entire lead foot on the surface. Brace your abdominals, keep your trunk upright, and lean slightly from your ankles rather than folding at your waist. Drive through the lead leg, bring the second foot up, stand tall, then lower under control. Step with control. If the descent thuds, you're dropping, not training.
You can alternate lead legs each rep or finish a short set on one side before switching. Beginners usually learn faster by completing one side, resetting, then changing legs. Either way, the lead leg does the work. Don't turn the trailing leg into a springboard.
What controlled actually looks like
Watch for these failure modes and correct them immediately.
- Hanging heel: Your foot isn't fully supported, so ankle and knee control suffer.
- Trailing leg push: You bounce off the floor instead of driving through the lead leg.
- Knee collapsing inward: Your alignment is gone, even if you complete the rep.
- Moving chair: The set is over. Don't step more gently and hope.
- Fatigue sloppiness: You keep going after upright control disappears.
The clip below is useful for seeing rhythm and foot placement at normal speed. Slow it down in your own practice until every landing is quiet.
A practical beginner benchmark is 1 to 2 sets of 10 repetitions per leg. Don't progress just because you survived it. Progress when that volume feels easy, around 1 to 2 on a 0 to 10 difficulty scale, and your knee, trunk, and descent still look organized. Easy and clean earns the next step.
Beginner Modifications and Stop Rules
Your first version should look almost too easy. Put one hand on a wall or railing, use a lower stair instead of a chair, and make the step down slower than the step up. Support isn't cheating. It's how you learn the pattern without spending every rep rescuing your balance.
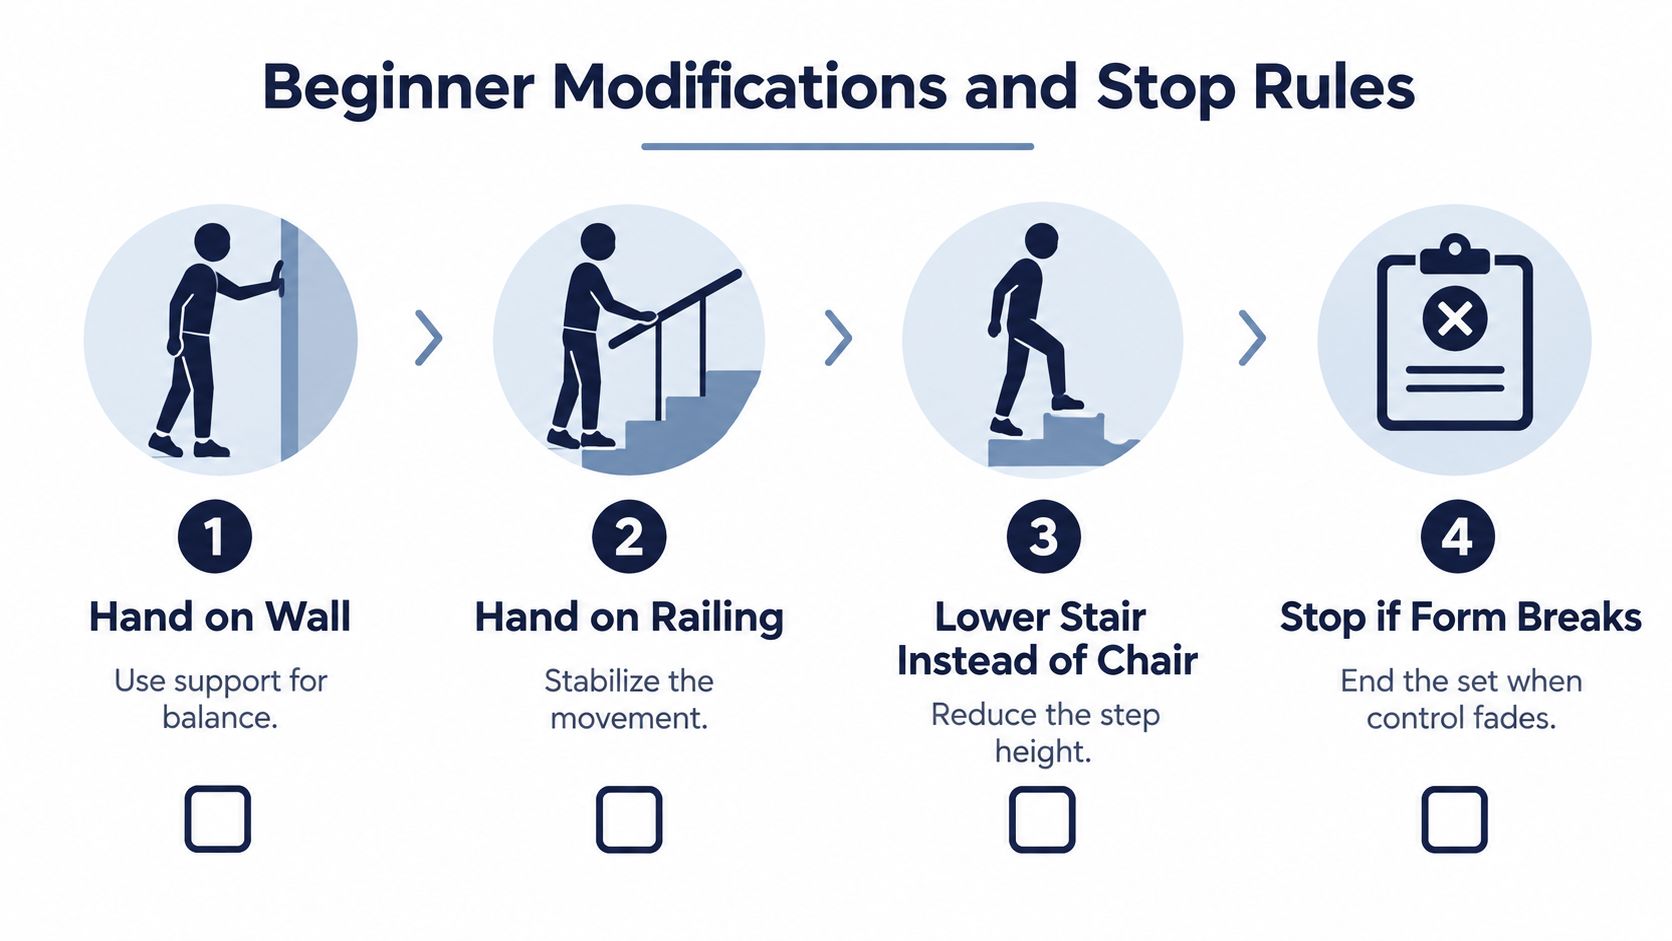
If elevation still bothers your knee or balance, remove it. A clean sit to stand trains a useful pattern without a drop from height. Marching in place gives you a movement break when stepping up isn't appropriate that day. Readers who need a broader starting framework can use bodyweight training for beginners guidance to place these regressions beside other basic movements.
Change one lever at a time
Height, support, repetitions, rest, and speed are separate variables. Don't raise the platform, remove your hand, and chase more reps in the same session. Keep the current version until it's technically clean, then adjust one lever and retest. That discipline sounds slow. It's how you avoid restarting after a sore knee or a scare.
Structured indoor stepping can improve several fall risk factors with little space or equipment. In a 2008 randomized study of 68 adults aged 65 to 74, square stepping improved leg power, balance, agility, reaction time, chair stand performance, functional reach, and rising from the floor compared with walking. Reported fall rates during follow up were 23.4% per person year versus 33.3%, but that difference wasn't statistically significant. Don't claim a chair workout prevents falls. Do use stepping, carefully scaled, to train relevant capacities.
Stop the set for pain, dizziness, a sliding chair, a wobbly landing, or a knee that keeps collapsing inward. No rep after that point is productive.
Memorize that rule before you start. Mid set, you won't make a better decision than the one you already set.
Fitting Brief Step-Ups into a Home Routine
Short doesn't automatically mean fast. Separate your brief step ups by purpose, or every movement break will drift into tired, noisy reps. Low intensity sets reset you between tasks. Moderate controlled sets build muscular endurance. Brief vigorous work comes last, only after balance, foot placement, and quiet descents are reliable.
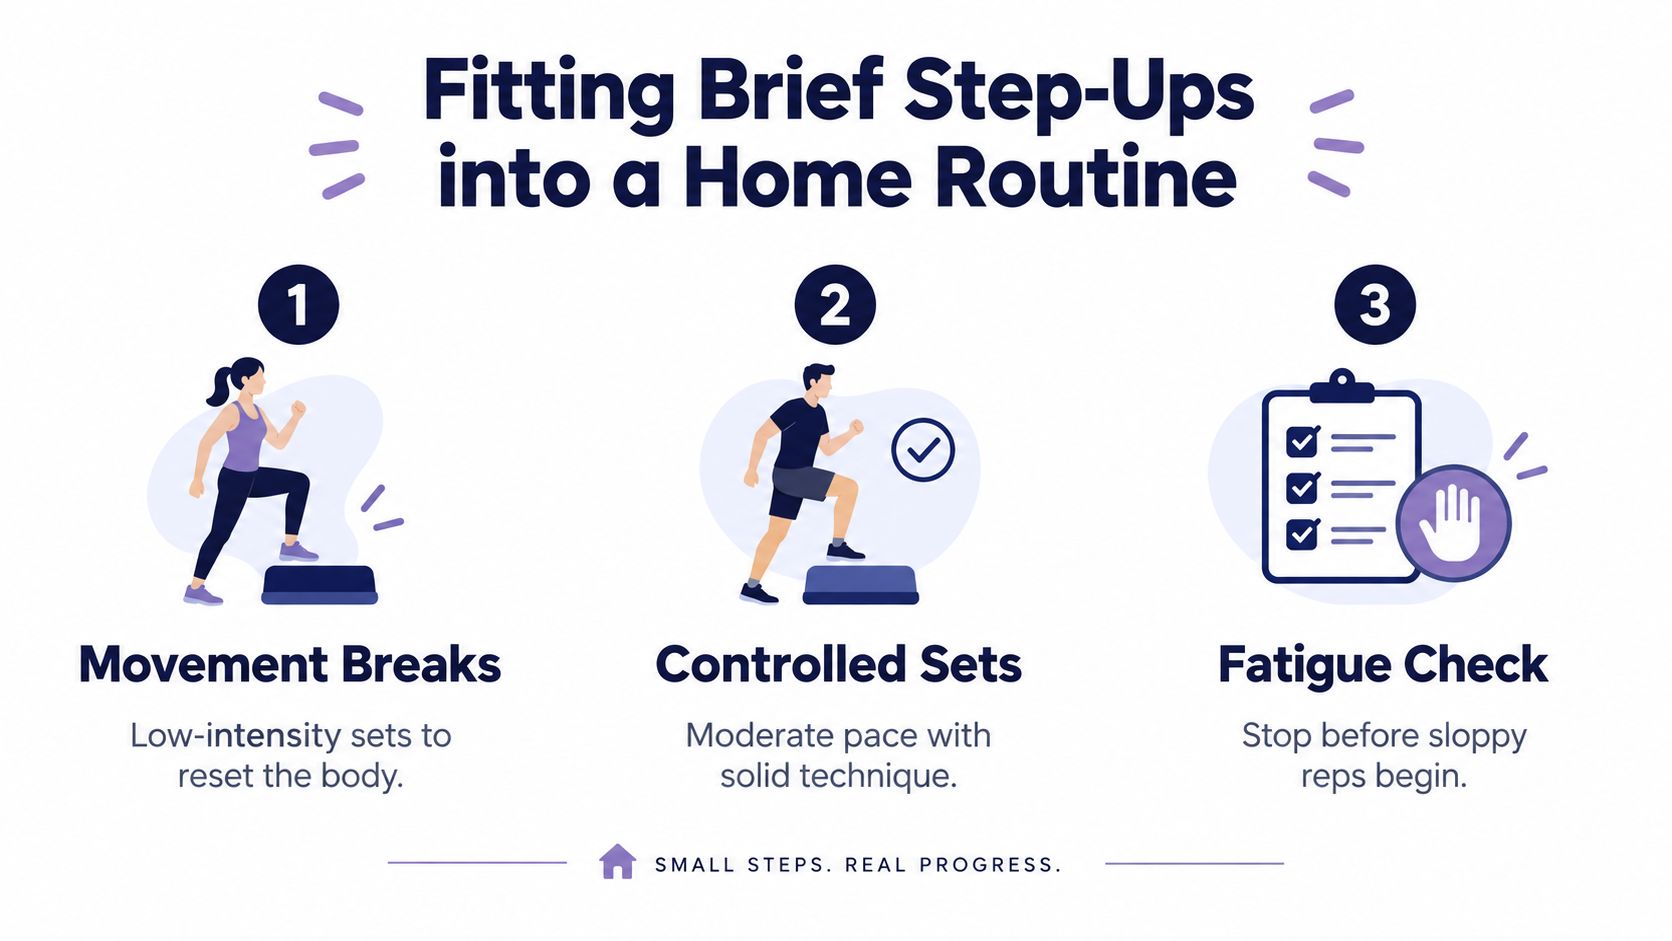
Exercise snack evidence supports short bouts, but it doesn't justify maximal speed chair stepping for beginners. A 2025 systematic review and meta analysis pooled 11 randomized trials with 414 participants, using bouts of five minutes or less at least twice daily, while some stair protocols lasted roughly 20 to 30 seconds. Protocols varied substantially. Treat that as support for short bout feasibility, not a universal chair prescription.
Log quality, not just volume
An untracked promise to do a few reps when you remember usually fades. A simple log works better if it rewards control. SuperStrong is an iPhone only app built around one shared wall for up to four friends, with three training days and four rest days each week. Small goals can rise when they feel easy, and quick logging covers bodyweight moves such as squats.
Tile size grows with reps and a NEW PR badge marks personal bests. That's useful visibility, but don't let it turn your wall into a race for bigger tiles. Log the controlled set you performed, then let a friend acknowledge it with a one tap sticker, limited to four per tile. If you're building a wider at home no equipment workout routine, keep step ups in the quality column, not the exhaustion column.
Use this weekly pattern. On training days, do one easy movement break and, if form stays clean, one moderate set later. On rest days, march, walk, or skip elevation entirely. Speed waits until the slow version is repeatable without hand grabs, knee collapse, or heavy landings.
Start Your Next Step Up Chair Session
Do one session today, and keep it deliberately modest. Choose the lowest stable platform that passed your setup test, stand beside a wall or railing, and complete one easy set only while your alignment stays quiet. If the chair shifts, your knee caves in, your balance goes, or your breathing makes you rush the descent, stop. That is the session.
Don't try to make tomorrow harder in three directions. Raise only one variable next time, whether that's a little less hand support, a few more controlled reps, shorter rest, a slightly higher stable surface, or a modest pace increase. The variable you choose matters less than changing it alone. You'll know exactly what caused better control or worse form.
Then make the work visible. Open SuperStrong on your iPhone and start with an empty wall, rather than copying the sample Floor Club wall. Invite up to four friends, choose a training day, and log the clean set so the tile represents a controlled bout. Small work counts when people you trust can see it.
That same wall can be viewed across days, weeks, months, and a year, which makes modest home sessions accumulate without points, streaks, or graphs. You're not trying to win a leaderboard. You're building visible proof that you showed up, used a sensible platform, and stopped before good reps turned sloppy. Set up the step, touch the wall, and log one clean set today.
Log that first controlled step up set in SuperStrong, where your iPhone wall turns small home sessions into visible tiles shared with up to four friends. Start with an empty wall, keep the goal modest, and increase it only when the work feels easy.